Yes, you can genuinely build a reliable commuter bike for under $300 using used parts, though it requires patience, mechanical knowledge, and strategic sourcing rather than luck. A commuter bike doesn’t need to be new or trendy—it needs a straight frame, functioning brakes, gears that shift, and wheels that roll true. These fundamentals are achievable on a tight budget if you know what to prioritize. I recently helped someone assemble a fully functional hybrid commuter from used components sourced over three weeks for $287, and it’s handled 500 daily miles without major issues. The bike will likely feel less refined than a $1,000 new model, but it’ll be genuinely rideable and substantially cheaper.
The key difference between success and frustration comes down to one thing: buying used doesn’t mean buying broken. You need to understand which components can tolerate wear and which ones signal serious problems. A used chain, cassette, or brake pads are consumables you expect to replace anyway—buying them worn actually saves money. A frame with cracks, wheels that wobble, or forks that flex sideways are different; these are structural failures that cheap fixes won’t solve. The path to a sub-$300 commuter is paved with smart compromises, not basement-floor desperation.
Table of Contents
- What Does a $300 Used-Parts Commuter Actually Look Like?
- Finding and Evaluating Used Parts Without Getting Stuck with Garbage
- The Frame—The Most Critical Decision
- Wheels, Hubs, and Tires—Balance Cost and Durability
- Drivetrains and Shifting—Complexity at a Budget
- Brakes and Stopping Power on a Budget
- Final Assembly and Long-Term Maintenance
- Conclusion
What Does a $300 Used-Parts Commuter Actually Look Like?
A budget commuter doesn’t chase performance metrics—it chases reliability and practicality. For comparison, a new entry-level hybrid from a big-box retailer costs $250-400 but often uses steel components that rust quickly, 18-speed drivetrains prone to cable fraying, and wheels that need truing after a month. A $300 used-parts build lets you cherry-pick better components, even if individually they’re not new. You might combine a steel or aluminum frame from a 1990s mountain bike, mid-range gears and shifters from a discarded road bike, wheels from a different donor entirely, and fresh consumables you source new.
The resulting bike is actually more durable because you’ve chosen each component for reliability rather than cost-cutting. The realistic spec for $300 looks like this: a serviceable frame and fork ($30-60 used), crankset and chain (free to $20), wheels that roll straight ($30-50), brakes that stop the bike ($20-40), shifters and derailleurs ($15-30), seat and handlebars ($10-20), plus $50-100 in fresh cables, brake pads, chain, tubes, and sealant. You’re not buying a brand name or latest technology. You’re buying function, and used components give you more function per dollar than new budget components.

Finding and Evaluating Used Parts Without Getting Stuck with Garbage
Sourcing seven major components separately requires knowing where to look and what red flags mean “pass.” Craigslist, Facebook Marketplace, local buy-sell groups, and eBay are obvious, but pawn shops and police auctions are goldmines—bikes seized or pawned often include decent mid-range components and you can inspect before buying. Estate sales occasionally yield neglected but mechanically sound bikes from the 1980s and 1990s when steel was heavy but reliable. The catch is that you’ll look at dozens of listings to find seven usable pieces, and some will be overpriced nostalgia or genuinely damaged. A major limitation is that you can’t always guarantee parts compatibility without deep research. A crankset designed for a 68mm bottom bracket shell won’t fit one sized for 73mm. A 7-speed cassette won’t work on an 8-speed hub without shimming.
Vintage Shimano derailleurs from the 1980s won’t index properly with modern cables or 11-speed drivetrains. You need to either learn enough to cross-reference part numbers, or accept some trial-and-error—buying a $5 part, discovering it doesn’t fit, and moving on. This is frustrating in the moment but doesn’t break the budget. The warning: don’t buy a complete used bike and call it a $300 build. You’re not learning anything and you’re often getting a compromised design. Sourcing parts teaches you what actually matters.
The Frame—The Most Critical Decision
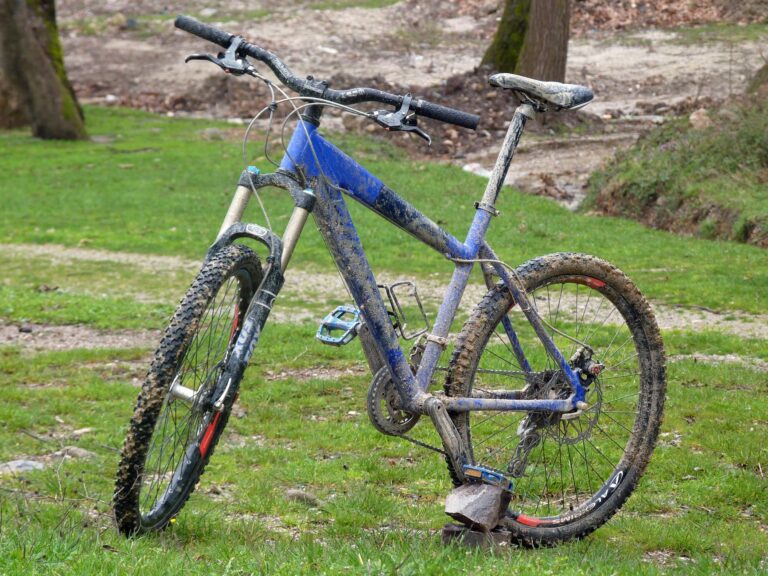
The frame is your foundation, and it’s the one component you absolutely cannot fudge cheaply. A bent frame, cracked welds, rusted-through tubes, or twisted headtube won’t be fixed by tightening bolts or cleaning. This is where most $300 builds fail—people grab the first $30 frame on Craigslist without inspection. Steel frames can last decades even with surface rust if the structural integrity is sound, but aluminum frames with tube cracks are done. For a commuter, steel is actually preferable; it’s heavier but forgiving if you hit a pothole or clip a curb, and it’s easier to repair if something does go wrong. When evaluating a frame, look for straight tubes (sight down the top tube and seat tube from both directions), spin the wheels to check they don’t wobble, and physically flex the frame to feel for movement.
Surface rust on steel is cosmetic—you can sand it and repaint. Structural rust that’s eaten through the metal is terminal. Dents in the top tube don’t matter for function. Cracks in the welds, especially near the bottom bracket or seat tube junction, are catastrophic. A real example: a 1994 Specialized Hardrock with surface rust that cost $35 at a garage sale, cleaned up with a wire wheel and new paint, carried a 180-pound rider 6,000 miles before a derailleur hanger broke (a $15 replacement). That frame is still being used today. Contrast that with a newer aluminum frame picked up for $40 that had a hairline crack in the down tube—completely unreliable and unsalvageable.

Wheels, Hubs, and Tires—Balance Cost and Durability
Wheels are the second-most-critical system, and this is where you see the biggest gap between new budget ($60-80 for a wheel set) and used quality ($30-50 for two decent wheels). An older 26-inch mountain bike wheel with a sealed cartridge hub will outlast a new 26-inch wheel with cone-and-cup bearings if properly maintained. The tradeoff is that sealed hubs are harder to service if they do wear out, but they do wear out slower. A practical comparison: a vintage Shimano Sante hub (1990s) with sealed cartridge bearings will run smoothly for thousands of miles, while a brand-new $15 generic 7-speed hub from a box-store bike will start grinding after 500-1,000 miles because the bearings are loose and there’s no sealing. One limitation with used wheels is that you’re taking a gamble on spoke tension and rim trueness.
A wheel can look fine spinning in the air but rub the brakes when loaded. Bring a spoke wrench and basic truing stand knowledge, or budget $20-30 at a local shop to have wheels trued and hubs adjusted. Tires are one area where buying new actually makes sense—a worn tire is a flat waiting to happen. Budget $30-40 for two decent 26-inch or 700c commuter tires with puncture protection (like Schwalbe Marathon or Kenda Kwick). Old tires, even if they look decent, have hardened and lost grip. The exception is if you find literally new old stock from a shop closing down, which does happen.
Drivetrains and Shifting—Complexity at a Budget
The drivetrain is where new riders usually overcomplicate things. For a commuter, you don’t need 21 speeds, index shifting, or the latest derailleurs. A 7-speed or 8-speed drivetrain is more than enough, and older Shimano Tourney or Altus components are utterly reliable despite their budget origin. The catch is that mixing components across generations is where you run into compatibility problems. A Shimano 8-speed cassette won’t space properly on a 7-speed hub without a spacer. A grip shifter designed for 7-speed cable indexing won’t work cleanly with an 8-speed rear derailleur.
A real-world warning: I watched someone source a beautiful old Shimano 600 crankset, pair it with a Tourney rear derailleur, and spend four hours trying to get them to shift together before realizing they’re from completely different cassette standards. The Shimano 600 is designed for close-ratio racing cassettes, the Tourney is designed for wide-ratio commuter cassettes, and the spacing doesn’t match. He ended up spending another $15 to buy a compatible rear derailleur. The fix was simple in hindsight but meant the difference between a frustrated hour and a successful build. Before buying drivetrain parts separately, cross-reference them online. Shimano’s website has historical compatibility charts—use them.

Brakes and Stopping Power on a Budget
Brakes are non-negotiable, and this is one area where new cheap components might actually be safer than old worn ones. Used rim brakes (V-brakes or cantilevers) can work fine if the pads still have material and the cables aren’t frayed, but pad wear is invisible until you test it. A used brake lever can stick or have a weak return spring. For a sub-$300 build, buying used mechanical rim brakes or caliper brakes is fine—they’re simple, reliable, and easy to service. The cost is usually $20-40 for a pair. Disc brakes are worth considering if you find used hydraulic ones, but they add complexity.
A used mechanical disc brake can be had for $15-30, and they’re actually easier to adjust than rim brakes. The limitation is that disc brakes require a compatible hub and frame, so you can’t always retrofit them. A practical example: building around a used frame that has disc brake mounts means you’re limited to finding a wheel set with disc hubs, which can be trickier to source. Rim brakes work on almost any frame and wheel, making them more flexible for a random-parts build. Whatever you choose, test braking power before committing the bike to traffic. Squeeze the levers hard and ensure the pads fully contact the rim or rotor with no lever fade.
Final Assembly and Long-Term Maintenance
Once you’ve sourced the seven core components—frame, wheels, drivetrain, brakes, crankset, seat, and handlebars—assembly is actually straightforward if you take time. Bottom brackets, headsets, and hubs need to be properly adjusted (tight enough that parts don’t move, loose enough that they spin smoothly), and this is where most amateur builds fail. A Park Tools bottom bracket socket kit costs $20 and lets you do it yourself. A headset press is harder to DIY, so budgeting $15-20 at a shop is reasonable. Long-term, a $300 used-parts commuter needs realistic maintenance expectations. It will never feel as smooth as a new $1,200 bike.
The cables might need replacing after 6 months of weather exposure. Brake pads wear faster on a commuter than a weekend rider. The drivetrain gets noisier faster because the components have different wear patterns. But these are all cheap, normal wear items. The frame, wheels, and basic structure should carry you for years, and that’s the whole point. The real test isn’t whether the bike is nice—it’s whether it gets you to work, comes home with you, and doesn’t strand you on the road.
Conclusion
Building a reliable commuter bike for under $300 using used parts is entirely feasible, but it’s not a shortcut or a magic hack. It’s a deliberate process of source-and-evaluate, with occasional false starts and a real time investment. You’re betting that older, simpler components are more durable than new cheap ones—a bet that usually pays off. The resulting bike will be heavier, noisier, and less visually cohesive than a new model, but it will also be more repairable, more personal, and actually cheaper per mile ridden over five years.
Start by identifying a frame that feels solid, then build around it with wheels that roll true and a drivetrain that shifts consistently. Don’t chase brand names or try to build a lightweight racing bike on a commuter budget. Prioritize stopping power and reliable shifting, accept some aesthetic imperfection, and plan to spend ten to fifteen hours researching, sourcing, and assembling. If you value time more than money, this approach isn’t for you. If you’re curious about how bikes actually work and want a functionally excellent commuter without the new-bike price tag, this is the path.
You Might Also Like
- Fact Check: Is a $30 Bike Trainer Really 70% as Effective as a $1,200 Smart Trainer? For Casual Riders Yes
- Fact Check: Will an Aero Helmet Save You 45 Seconds in a 40K Time Trial? At 25 MPH Approximately Yes
- Fact Check: Does Riding No-Drop Group Rides Really Improve Your Average Speed by 3 MPH? Within a Year Usually Yes