Tubeless tire systems eliminate inner tubes, reducing flats and allowing lower pressures for improved grip. Most modern mountain bike wheels and tires are tubeless-compatible. Setting up tubeless at home requires some supplies and technique but is accessible to most home mechanics.
This guide walks through the tubeless setup process. Understanding the steps and common challenges helps you achieve reliable tubeless performance.
Table of Contents
- Benefits of Tubeless
- What You Need
- Rim and Tire Preparation
- Tape Application
- Mounting and Seating
- Adding Sealant
- Troubleshooting
- Frequently Asked Questions
Benefits of Tubeless
Tubeless tires self-seal small punctures. Sealant inside the tire plugs holes from thorns, small cuts, and minor impacts. Most punctures seal instantly without you noticing. This dramatically reduces trail-side flat repairs.
Lower pressures are possible without pinch flat risk. Without tubes, there is nothing to pinch between tire and rim. Running lower pressure improves grip, comfort, and rolling efficiency over rough terrain. Many riders run 5-10 psi lower than with tubes.
- Self-sealing punctures
- Fewer flat repairs
- Lower pressure possible
- No pinch flats
- Better grip and comfort
What You Need for Setup
Tubeless-ready rims and tires are essential. Look for “TR,” “TLR,” or “Tubeless Ready” designations. Non-tubeless components may work but are more difficult and less reliable. Start with compatible equipment.
Required supplies include tubeless rim tape appropriate for your rim width, tubeless valve stems, and sealant. A floor pump with pressure gauge is necessary. A compressor or tubeless inflator tank makes seating easier but is not always required.
- Tubeless-ready rim and tire
- Rim tape for rim width
- Tubeless valve stems
- Sealant (60-90ml per tire)
- Floor pump or compressor
Rim and Tire Preparation
Clean the rim bed thoroughly. Remove old tape and residue. Any contamination prevents new tape from adhering properly. Isopropyl alcohol cleans effectively without leaving residue. Dry completely before applying tape.
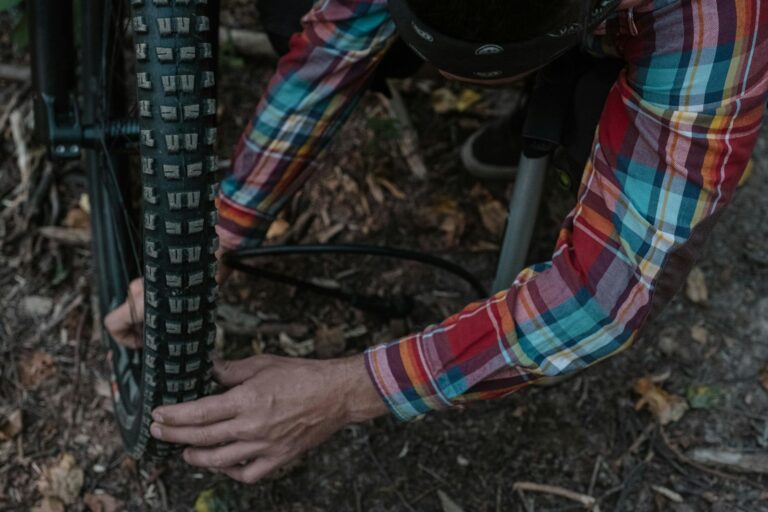
Inspect tires for damage. Small cuts or manufacturing defects may prevent sealing. Verify tire direction arrows match intended rotation. Stretch tight tires on a spare rim first if they are extremely tight.
- Clean rim bed thoroughly
- Remove old tape residue
- Use isopropyl alcohol
- Inspect tires for damage
- Check rotation direction
Tape Application
Use tape slightly wider than the internal rim width. Tape should extend up the rim walls slightly but not interfere with tire bead seating. Start opposite the valve hole and apply one continuous wrap plus a few inches of overlap.
Keep tape centered and stretched tight during application. No wrinkles or air bubbles should remain. Press tape firmly into corners and around spoke holes. Use a smooth tool to seal tape edges. Any gaps allow air escape and prevent sealing.
- Tape wider than rim internal width
- One wrap plus overlap
- Keep centered and tight
- No wrinkles or bubbles
- Press firmly into corners
Mounting and Seating the Tire
Install the tubeless valve through the tape. Ensure the valve seal is tight and centered. Tighten the valve nut firmly but not excessively. The valve must seal airtight against the tape.
Mount the tire carefully without tire levers if possible to avoid tape damage. Seat one bead completely, then the other. Inflate quickly with high-volume air to snap beads into place. A compressor works best; a floor pump with removed valve core sometimes works. Listen for the beads seating with audible pops.
- Install tubeless valve tightly
- Avoid tire levers on tape
- Seat one bead, then the other
- Inflate quickly with volume
- Listen for bead seating pops
Adding Sealant
Add sealant after beads are seated. Remove the valve core with a valve core tool. Pour or inject 60-90ml of sealant depending on tire size. Reinstall the valve core and tighten.
Inflate to higher than riding pressure to help seal the bead interface. Spin and shake the wheel to distribute sealant across all interior surfaces. Lay the wheel flat on each side for a few minutes to seal the bead area. Check pressure after 24 hours.
- Remove valve core to add sealant
- 60-90ml per tire typical
- Inflate higher than riding pressure
- Spin and shake to distribute
- Check pressure after 24 hours
Troubleshooting Common Issues
Tire will not seat: Ensure tape is tight with no gaps. Try soapy water on bead and rim interface. Remove valve core for maximum airflow. Use a compressor or tubeless tank if floor pump cannot provide enough volume.
Air leaking from sidewall: Add more sealant and spin wheel to coat sidewall. Some tires have porous casings requiring extra sealant. Persistent leaks may indicate damaged or incompatible tire.
- Check tape for gaps
- Soapy water helps seating
- Remove valve core for airflow
- Compressor for difficult tires
- More sealant for porous casings
Expert Tips for Tubeless
- Refresh sealant every 2-4 months
- Carry a spare tube for emergencies
- Check pressure before every ride
- Clean and retape rims annually
- Experiment with pressure to find ideal for your riding
Conclusion
Tubeless setup is achievable at home with proper supplies and technique. The benefits of fewer flats, lower pressures, and improved performance justify the initial effort. Follow the process carefully for reliable results.
Maintenance includes regular sealant refresh and occasional retaping. Once established, tubeless systems require minimal ongoing effort. The improved trail experience makes tubeless worthwhile for most mountain bikers.
Frequently Asked Questions
How often should I add sealant?
Every 2-4 months depending on conditions. Hot, dry climates dry sealant faster. Check by shaking the wheel and listening for liquid movement. Add sealant when levels are low rather than waiting for complete depletion.
Can any tire go tubeless?
Only tubeless-ready tires are recommended. Non-tubeless tires lack the bead design and casing construction for reliable sealing. While some non-tubeless tires can work, failures are more likely. Use proper tubeless-compatible tires.
Why is my tire losing pressure overnight?
Slow leaks typically occur at the bead or valve. Check valve tightness and seal. Spin wheel to coat bead area with sealant. Some pressure loss is normal as tubeless systems are not perfectly airtight. Significant loss indicates a sealing problem.
Do I still need to carry a tube?
Yes, for emergencies. Large cuts or damage beyond sealant capability require a tube to get home. Carry a tube, tire lever, and pump or CO2 even with tubeless. The tube installs over existing sealant to get you home.
What pressure should I run tubeless?
Lower than with tubes, typically 5-10 psi less. Start around 25-28 psi for trail riding and adjust based on feel and rim strikes. Tire size, rider weight, and terrain affect ideal pressure. Experiment to find your preference.
How do I remove dried sealant from tires?
Peel dried sealant from the tire interior by hand. Warm, soapy water helps remove residue. Dried sealant in the valve core can be removed with a small brush or by replacing the core. Clean before adding fresh sealant.