Servicing your bike wheel bearings involves disassembling the hub, cleaning out old grease and contaminants, inspecting the bearing surfaces for wear, repacking with fresh grease, and reassembling with proper preload adjustment. For most riders, this maintenance should be performed once per year according to bearing manufacturers, though your actual service interval depends heavily on riding conditions—dry weather riders may go two or more years between service, while those regularly riding in wet or dusty environments might need to repack bearings every couple of months. The process is straightforward for cup and cone bearing systems, which remain common on many quality hubs including Shimano’s lineup. A rider who commutes year-round through Pacific Northwest rain, for example, will notice their bearings developing a gritty feel far sooner than a fair-weather cyclist in Arizona.
The good news is that well-sealed hubs like Shimano Deore, 105, and higher-tier models resist contamination better and need less frequent attention. This guide covers the diagnostic signs that indicate service is needed, the specific tools and greases required, step-by-step repacking procedures, and how to properly adjust bearing preload to maximize hub longevity. Understanding when and how to service bearings can save significant money—professional wheel bearing replacement runs between $60 and $220 per wheel including parts and labor, with shop rates ranging from $50 to $150 per hour. Learning this skill pays for itself quickly if you own multiple bikes or ride frequently in harsh conditions.
Table of Contents
- How Often Should You Service Bike Wheel Bearings?
- Essential Cone Wrench Sizes and Tools for Hub Service
- Choosing the Right Grease for Wheel Bearing Repacking
- Step-by-Step Cup and Cone Bearing Repacking Process
- Cup and Cone Versus Sealed Cartridge Bearing Hubs
- When to Replace Rather Than Repack Bearings
- Conclusion
How Often Should You Service Bike Wheel Bearings?
The standard recommendation of annual bearing service works well as a baseline, but treating it as an absolute rule ignores the realities of how different riders use their bikes. A recreational cyclist logging 1,000 miles per year on paved paths in dry conditions places vastly different demands on their bearings than a cyclocross racer training through muddy fields several times weekly. The latter might wear through grease in weeks rather than months. Sealed cartridge bearings change the calculation somewhat. These units can go tens of thousands of miles without service in many cases, though they cannot be repacked—when they wear out, the entire cartridge must be replaced.
This makes them lower maintenance overall but potentially more expensive when service finally becomes necessary. Cup and cone systems require more frequent attention but allow for adjustment and repacking rather than replacement, which many home mechanics prefer. Environmental factors matter more than mileage in most cases. Stream crossings, pressure washing the bike, riding through sandy terrain, or regular exposure to road salt all accelerate grease contamination and breakdown. If you ride primarily on dry roads and store your bike indoors, extending service intervals beyond one year is reasonable. However, if you frequently ride in rain or wash your bike with a hose, checking bearing condition every few months prevents premature wear.
Essential Cone Wrench Sizes and Tools for Hub Service
Cone wrenches differ from standard wrenches in their thickness—approximately 2mm compared to 7mm for regular wrenches. This thin profile allows them to fit into the narrow space between the cone and locknut on cup and cone hubs. Using a standard wrench will not work and risks damaging the hub components. The most common sizing follows a predictable pattern: front hubs typically use 13mm cones with 15mm locknuts, while rear hubs use 15mm cones with 17mm locknuts.
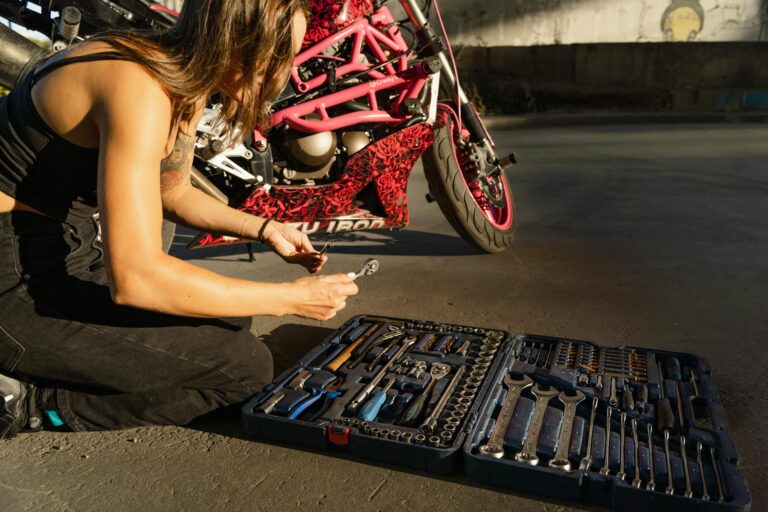
A practical starter set includes 13mm, 15mm (two of these, since you need to work both sides of a rear hub simultaneously), and 17mm cone wrenches. Cone wrenches commonly range from 13mm to 28mm to cover various hub designs, though the smaller sizes handle most standard applications. Beyond cone wrenches, you will need a quality bearing grease, clean rags, a small parts tray to prevent losing ball bearings, and solvent for cleaning old grease from bearing races. Some mechanics use a magnetic parts dish since the steel ball bearings will stick to it, eliminating the risk of bearings rolling off the workbench and disappearing. Having the correct locknut wrench—usually a standard open-end wrench in the appropriate size—completes the basic toolkit.
Choosing the Right Grease for Wheel Bearing Repacking
Grease selection involves tradeoffs between water resistance, temperature tolerance, and mechanical properties. Park Tool’s PPL-1 uses a polyurea base and works well as an all-purpose bicycle grease suitable for bearings, threads, and other applications. Their HPG-1 offers lower shearing force and better heat tolerance but sacrifices some water resistance compared to PPL-1—making it potentially less suitable for riders who frequently encounter wet conditions. Phil Wood Waterproof Grease takes a different approach with a marine grease formulation designed for long-lasting water resistance. Shimano uses a calcium-based formulation in their greases. Mixing different grease types within the same bearing is generally inadvisable since incompatible base stocks can cause consistency problems or accelerated breakdown. One critical factor often overlooked is grease quantity. The optimal fill level is only 33% of the unoccupied bearing volume—overfilling causes overheating and premature failure as the excess grease creates drag and cannot dissipate heat properly. More grease does not mean better protection. A thin, even coating on the bearing races and balls provides adequate lubrication without the problems associated with overpacking. This is where many first-time mechanics make mistakes, assuming that generous grease application improves longevity when it actually causes problems.
## How to Diagnose Worn or Loose Wheel Bearings Before disassembling anything, confirm that service is actually needed. With the wheel mounted on the bike, position your hands opposite each other on the tire and rock the wheel side to side. Any perceptible play indicates loose bearings or worn components that require attention. This check takes seconds and should become part of your regular pre-ride inspection. For a more detailed assessment, remove the wheel and spin the axle by hand between your fingers. Properly greased bearings should produce a smooth drag—you will feel the resistance of the grease, but there should be no gritty sensation or rough spots in the rotation. Grittiness indicates contamination or bearing surface damage. Rough spots or notchy feeling during rotation often means the bearing races have developed pitting, which may require replacement rather than simple repacking. Compare both wheels using this method. Sometimes one wheel will feel noticeably rougher than the other due to differences in exposure—the rear wheel on many bikes receives more spray from the road surface, for instance. A wheel that spins freely with no perceptible drag may actually be too loose and benefit from preload adjustment even if contamination is not present.

Step-by-Step Cup and Cone Bearing Repacking Process
Begin by removing the wheel and then the quick release or through axle. Note the order of spacers, seals, and other components on both sides—photographing the assembly before disassembly prevents confusion during reassembly. Working from the non-drive side on rear wheels (the side opposite the cassette), hold the cone with a cone wrench while loosening the locknut with a standard wrench. Remove the locknut, any spacers, and the cone from the non-drive side. You can now slide the axle out through the opposite side, catching the ball bearings as they fall free. Count the bearings from each side and inspect them for damage—most hubs use the same number on each side, but verify rather than assume.
Clean all components thoroughly using solvent and rags until no old grease remains on the cones, cups, or bearings. Inspect the bearing races—the machined cups inside the hub shell and the cone surfaces—for pitting, scoring, or discoloration. Minor wear marks are acceptable, but significant pitting requires cone or cup replacement. Apply fresh grease to the cup races and press the bearings into the grease so they stay in place. Reassemble in reverse order, then adjust preload so the axle spins smoothly without side play. This adjustment requires patience; the goal is the tightest setting that still allows free rotation. Tighten the locknut against the cone while holding the cone stationary to lock in your adjustment.
Cup and Cone Versus Sealed Cartridge Bearing Hubs
The choice between these bearing systems affects maintenance approach significantly. Cup and cone bearings use angular contact geometry that handles lateral loads effectively—useful since wheels experience side forces during cornering and when the bike flexes under power. This design allows infinite adjustability of preload and the ability to repack without replacing any components if surfaces remain undamaged. Sealed cartridge bearings trade serviceability for convenience. The sealed units resist contamination better initially, and when they eventually wear, replacement involves pressing out the old cartridge and pressing in a new one rather than adjusting anything.
However, you cannot adjust preload on most cartridge systems, and replacement costs more than repacking since you are buying new bearing units each time. For riders who prefer minimal maintenance or lack confidence in preload adjustment, cartridge bearings simplify ownership. Neither system is objectively superior—they optimize for different priorities. High-end racing wheels often use cartridge bearings for consistent performance and weight savings, while touring and utility bikes frequently use cup and cone systems for their field serviceability. A touring cyclist in a remote area can repack cup and cone bearings with basic tools; replacing a cartridge bearing requires the correct size cartridge and a press or specialized tools.

When to Replace Rather Than Repack Bearings
Repacking only addresses grease contamination and depletion—it cannot restore damaged bearing surfaces. If inspection reveals pitting on the cups or cones, or if the ball bearings show flat spots or discoloration, replacement is necessary. Continuing to use damaged bearings accelerates wear and can eventually cause hub failure. Replacement costs vary widely based on hub type and whether you perform the work yourself.
The $60 to $220 range for professional wheel bearing replacement reflects this variability, with e-bike hub motor bearings at the higher end due to motor disassembly complexity. Simple cartridge replacement on a standard hub costs less but still involves labor charges if you use a shop. Consider the overall hub condition when deciding whether replacement makes economic sense. An inexpensive hub with damaged cups may not justify the cost of professional service—replacement of the entire wheel or hub might provide better value. Quality hubs from Shimano, Chris King, or similar manufacturers warrant investment in proper service since the hub shell and other components will outlast multiple bearing services.
Conclusion
Regular bearing service extends hub life, maintains smooth wheel rotation, and prevents the expensive surprise of bearing failure during a ride. For most cyclists, annual inspection with repacking as needed provides adequate maintenance. Riders in harsh conditions should check bearing condition more frequently and expect shorter service intervals.
The skills and tools required for bearing service represent a worthwhile investment for any cyclist who plans to maintain their own bikes. A basic cone wrench set costs far less than a single professional service visit, and the ability to diagnose and address bearing issues yourself provides both cost savings and the satisfaction of understanding your equipment more deeply. Start with a front wheel, which has simpler hub internals than the rear, and work your way up to the more complex rear hub once you have confidence in the process.