Adjusting your bike’s headset requires loosening the stem pinch bolts first, then turning the top cap bolt in quarter-turn increments until play is eliminated without creating binding””a process that takes about five minutes once you understand the sequence. The most common mistake riders make is attempting to tighten the top cap while the stem bolts are still clamped, which accomplishes nothing because the compression system cannot function when the stem is locked in place. A properly adjusted headset should allow the handlebars to rotate freely from lock to lock while producing no clunk or play when you rock the bike with the front brake engaged.
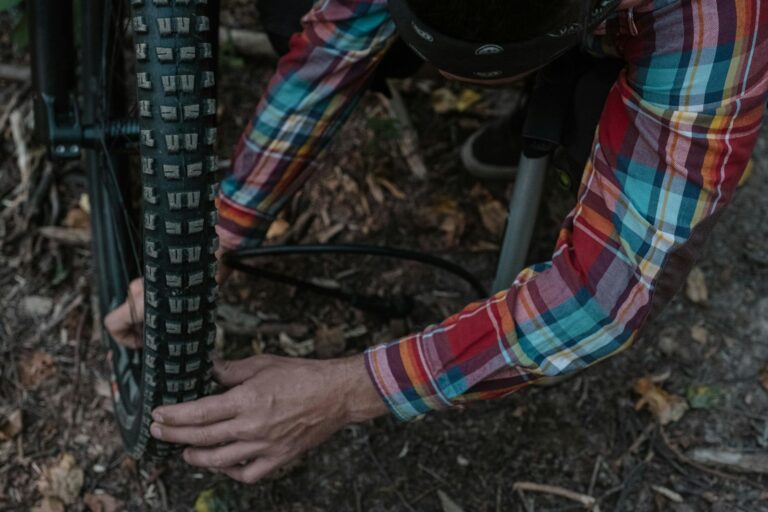
Consider the mountain biker who returns from a creek crossing and notices vague, imprecise steering developing over the following weeks. Water has pushed past the headset seals during that crossing, quietly corroding the bearings from the inside. This scenario illustrates why headset maintenance extends beyond simple adjustment””it involves understanding how environmental exposure affects the components and establishing preventive routines before damage becomes irreversible. This article covers the complete diagnostic and adjustment procedure for threadless headsets, explains the maintenance schedule that protects your investment, and identifies the warning signs that indicate when adjustment is no longer sufficient and replacement becomes necessary.
Table of Contents
- How Do You Check if Your Bike Headset Needs Adjustment?
- Step-by-Step Threadless Headset Adjustment Procedure
- Maintenance Schedule for Headset Longevity
- Recognizing When Adjustment Is Not Enough
- Carbon Versus Aluminum Steerer Considerations
- Environmental Factors Affecting Headset Health
- Building Headset Checks Into Your Routine
- Conclusion
How Do You Check if Your Bike Headset Needs Adjustment?
The play detection method remains the most reliable diagnostic technique for headset condition. Hold your front brake firmly and rock the entire bike forward and backward. A distinct clunk emanating from the front of the bike indicates excessive play in the headset bearings. This looseness allows the fork steerer to move within the head tube, creating both the audible clunk and a tactile sensation you can feel through the handlebars. Overtightening produces different symptoms. Rotate your handlebars slowly from left to right while paying attention to the sensation through your hands.
A tight, gritty, or notchy feeling indicates the bearings are under excessive preload. This condition accelerates bearing wear and creates unpredictable steering response, particularly at low speeds where the resistance becomes most noticeable. Some riders describe the sensation as the steering wanting to “center” itself or resist smooth turning. One critical warning: brake pad contact with the rim can mimic a loose headset. When pads have excessive play or worn mounting hardware, rocking the bike produces a clunk at the front that originates from the brake rather than the headset. Before concluding your headset needs adjustment, turn the front wheel ninety degrees so the brake pads no longer contact the rim, then repeat the rocking test. If the clunk disappears, your headset is fine””your brakes need attention instead.

Step-by-Step Threadless Headset Adjustment Procedure
The adjustment sequence matters more than the adjustment itself. Begin by loosening the stem pinch bolts””typically two bolts on the back of the stem clamp””until the stem can rotate independently on the steerer tube. Never attempt to adjust preload via the top cap while the pinch bolts remain tightened. The top cap’s sole function is pulling upward on the steerer tube to compress the headset bearings; when the stem is clamped, this pulling action cannot occur regardless of how much you tighten that top cap bolt. With the stem freed, turn the top cap bolt clockwise in quarter-turn increments. After each quarter turn, recheck for play using the front brake method described above. The goal is eliminating play while maintaining free steering rotation.
Verify your adjustment by lifting the front wheel off the ground and rotating the handlebars from full left lock to full right lock. Movement should feel smooth throughout the range with no binding, catching, or resistance at any point. Once satisfied with the preload, align the stem with the front wheel and tighten the stem bolts to the manufacturer’s recommended torque. For most stems, this falls around 5 Nm, though your specific stem may differ””check the marking typically engraved near the bolt heads. However, if your headset refuses to tighten properly regardless of top cap adjustment, the steerer tube may be contacting the inside top of the stem. This occurs when the steerer was cut too long or spacers were removed. The solution requires adding a spacer below the stem to create the necessary gap for compression to occur.
Maintenance Schedule for Headset Longevity
Small adjustments become necessary every few months even on properly functioning headsets, and carbon steerer tubes particularly benefit from regular attention. The carbon-to-aluminum interface between steerer and stem can shift slightly under riding loads, gradually introducing play that was absent when first assembled. Riders with carbon forks should incorporate headset checks into their pre-ride routine, requiring only seconds but preventing the damage that develops from riding with undetected looseness. Water represents the primary threat to headset bearings. Creek crossings and enthusiastic bike washing push water past the seals that protect the bearings, initiating corrosion that progresses invisibly until steering quality degrades.
In wet climates or for riders who regularly encounter water, regreasing the headset four times per year using quality waterproof lubricant provides essential protection. This involves removing the fork, cleaning the bearing surfaces, applying fresh grease, and reassembling””a process taking roughly thirty minutes. The consequences of neglecting this maintenance extend beyond simple inconvenience. Riding with a loose headset proves extremely detrimental to bearing lifespan and may damage the fork steerer or head tube itself. The repetitive impact loading that occurs with each bump when the headset has play concentrates stress at the bearing contact points and the steerer tube interfaces, potentially creating damage that requires component replacement rather than simple adjustment.

Recognizing When Adjustment Is Not Enough
Worn headset symptoms manifest gradually, often so slowly that riders adapt without recognizing the degradation. Steering corrections become rough rather than smooth, requiring conscious effort rather than flowing naturally. Overall handling suffers in ways that feel more like declining fitness than mechanical problems””the bike simply seems less responsive and less predictable than remembered. A particularly telling symptom appears when the headset begins to “lock up” when the front wheel points straight ahead.
This indexing or notching occurs as the bearing surfaces develop wear patterns corresponding to the centered position. The bearings find this worn groove and resist leaving it, creating a dead zone in the steering that affects control during normal riding and becomes dangerous at high speeds where subtle corrections maintain stability. Excessive rust visible on the bearing surfaces and excessive play that returns immediately after adjustment signal that replacement is necessary. Adjustment cannot restore bearing surfaces that have degraded beyond their tolerance. Continuing to ride on a worn headset introduces unpredictability into your steering response and risks damage to the frame’s head tube””a far more expensive problem than a new headset.
Carbon Versus Aluminum Steerer Considerations
Carbon steerer tubes require more frequent attention than aluminum alternatives, not because of material weakness but because of assembly characteristics. The carbon-to-metal interfaces at the stem and crown race cannot achieve the same friction grip as aluminum-to-aluminum contact, even with proper assembly paste. This means preload settings can shift more readily under riding forces, making regular checks essential rather than optional.
Torque specifications become more critical with carbon components. Overtightening the top cap bolt to compensate for perceived looseness can damage the steerer tube, while overtightening the stem bolts creates the risk of crushing the tube. Carbon-specific assembly paste increases friction at these interfaces, reducing the tendency for settings to shift and allowing lower torque values to maintain security. However, this paste requires cleaning and reapplication when performing maintenance, adding steps to the procedure that aluminum systems can skip.
Environmental Factors Affecting Headset Health
Riding conditions dramatically influence maintenance requirements. The mountain biker crossing streams monthly faces fundamentally different demands than the road cyclist in arid climates. That creek crossing forces water directly into the head tube area, where it contacts seals designed for rain protection rather than submersion. Even sealed cartridge bearings allow some water intrusion under these conditions, particularly as seals age and lose compliance.
Road spray during wet weather presents a subtler but cumulative threat. Hours of riding in rain drives contaminated water upward along the fork legs and into the head tube junction. While less dramatic than crossing a stream, this exposure repeats frequently and provides extended contact time for moisture to work past seals. Riders in consistently wet climates should consider the four-times-yearly regreasing schedule as minimum maintenance rather than precautionary excess.
Building Headset Checks Into Your Routine
Integrating headset assessment into regular bike maintenance creates protective habits that catch problems early. The front brake rock test takes approximately three seconds and requires no tools””a natural addition to pre-ride tire pressure checks. Monthly attention identifies developing looseness before it causes damage, while seasonal detailed inspection catches seal degradation and contamination before bearings corrode.
Professional bike fits sometimes inadvertently affect headset preload when adjusting stem height or swapping components. After any work in the cockpit area, verify headset adjustment before your next ride. Similarly, after transporting bikes where the fork may have been removed or compressed, checking headset preload ensures nothing shifted during handling.
Conclusion
Headset adjustment follows a specific sequence that cannot be shortcut: loosen stem bolts first, adjust preload in quarter-turn increments, verify smooth rotation, then secure the stem to proper torque. This procedure addresses the most common headset complaints and takes only minutes once the sequence becomes familiar. Understanding why each step matters””particularly the requirement to free the stem before the top cap can function””prevents the frustration of adjustments that accomplish nothing.
Regular maintenance extending beyond adjustment protects both the headset and the components it interfaces with. The relatively small investment of time for quarterly regreasing in wet conditions or monthly play checks prevents the greater expense and inconvenience of damaged steerer tubes, worn head tubes, and the vague, unpredictable handling that develops as components deteriorate. A well-maintained headset provides years of precise steering; a neglected one creates problems that compound until replacement of multiple components becomes necessary.