A solid bike maintenance schedule breaks down into three tiers: pre-ride checks you do every time you swing a leg over the saddle, weekly tasks that take about fifteen minutes, and monthly work that runs closer to an hour. Weekly, you should be lubing your chain, wiping down the frame and drivetrain, inspecting tires for embedded debris, and checking spoke tension. Monthly, you go deeper — fully degreasing and cleaning the chain and cassette, inspecting brake pads for wear, verifying derailleur alignment, checking bolt torque across the cockpit and seatpost, and truing your wheels. A rider logging sixty miles a week who follows this schedule will spend far less on shop repairs over the life of the bike than someone who waits until something breaks.
This matters more than most cyclists realize. A neglected chain, for instance, doesn’t just shift poorly — it accelerates wear on your cassette and chainrings, turning a twelve-dollar replacement into a hundred-dollar one. The schedule laid out here is based on manufacturer recommendations and shop standards for riders in typical conditions. If you ride in rain, mud, or dust regularly, or you’re putting in more than 100 kilometers per week, cut every interval in half. This article walks through exactly what to do at each interval, explains why each task matters mechanically, covers what a professional tune-up includes and costs, and offers guidance on adjusting the schedule for your riding style.
Table of Contents
- What Should a Weekly Bike Maintenance Checklist Actually Include?
- Monthly Bike Maintenance Tasks That Prevent Expensive Repairs
- When Should You Replace Your Chain, Cables, and Bearings?
- Professional Tune-Ups vs. DIY: What’s Worth Paying For?
- Adjusting Your Schedule for Harsh Conditions and Heavy Mileage
- Building a Maintenance Toolkit Without Overspending
- Making the Schedule Stick
- Conclusion
- Frequently Asked Questions
What Should a Weekly Bike Maintenance Checklist Actually Include?
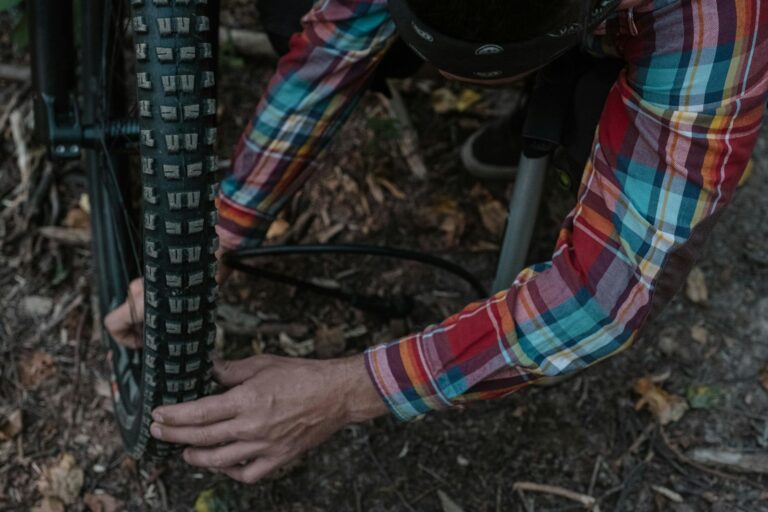
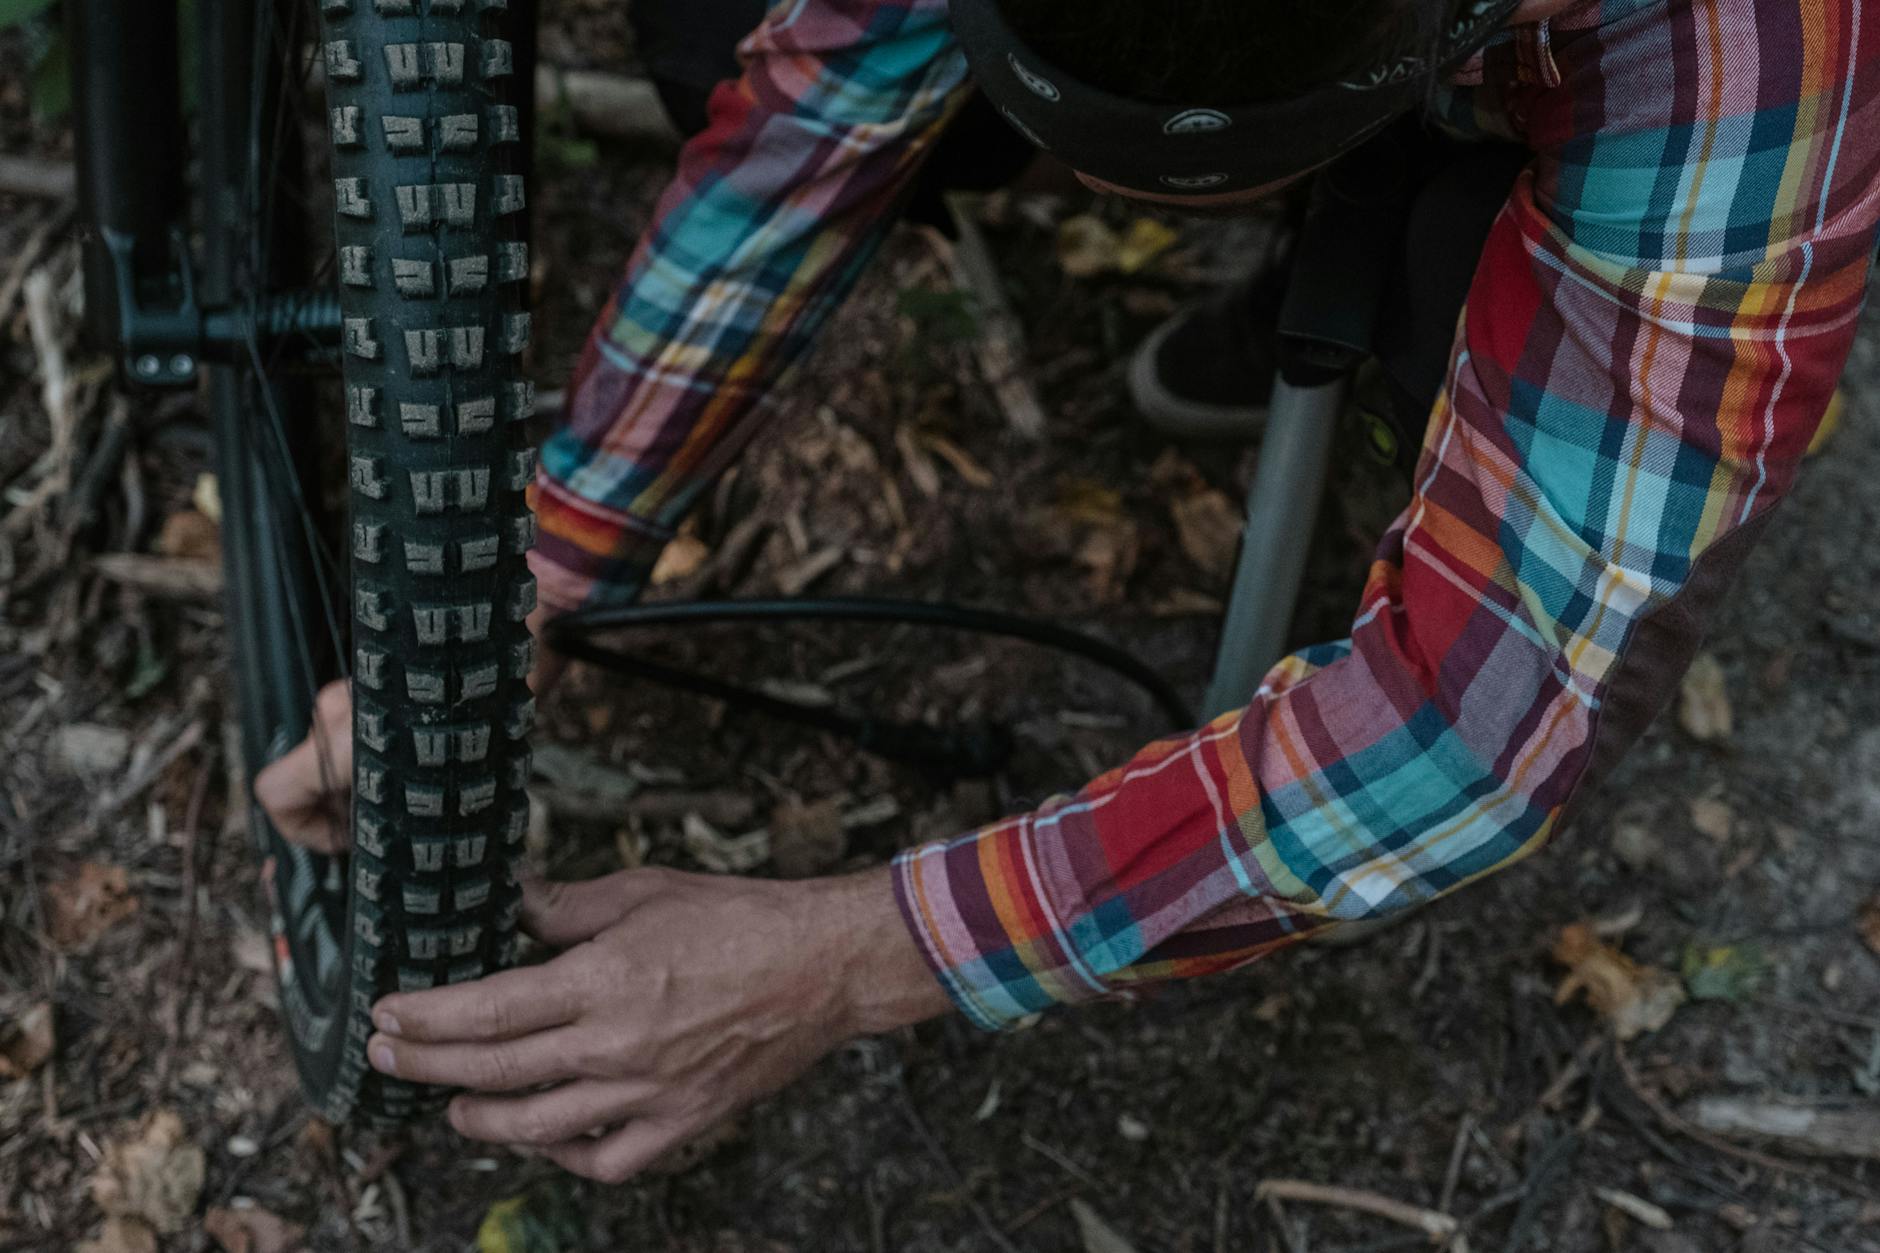
Four tasks form the backbone of weekly maintenance, and none of them requires specialized tools. First, apply chain lube — dry lube every 200 miles or roughly once per week, wet lube every 400 miles or every other week. Backpedal while dripping lube onto the chain, then wipe off the excess with a rag. A properly lubed chain runs quieter, shifts more crisply, and lasts significantly longer. Second, wipe down the frame and drivetrain with a damp cloth to remove road grime. Salt, sand, and moisture left on the frame promote corrosion on steel and aluminum components, and grit on the drivetrain acts like sandpaper against your chain, cassette, and derailleur pulleys. Third, inspect your tires by running your fingers slowly along the tread and sidewalls.
You’re feeling for embedded glass, thorns, or small cuts. Pulling a shard of glass out of your tire on a Sunday afternoon is a minor inconvenience. Ignoring it means a flat at mile thirty on Tuesday’s commute. Fourth, check spoke tension by squeezing pairs of spokes around each wheel and spinning the wheel to listen for anything loose or rattling. Consistent spoke tension prevents wheel wobble, and catching a loose spoke early keeps you from needing a full wheel true. For context, the pre-ride checks that should happen before every single ride are even simpler: verify tire pressure (80 to 130 PSI for road tires, 50 to 85 for hybrids, 25 to 50 for mountain bikes), squeeze both brake levers to confirm the pads engage properly and the bike stops evenly, and confirm your quick-release skewers or thru-axles are tight. Tires are porous and lose pressure through temperature fluctuations alone, so even if you rode yesterday, check today.
Monthly Bike Maintenance Tasks That Prevent Expensive Repairs
Monthly maintenance is where you shift from surface cleaning to actual inspection. The most important monthly task is a deep chain and cassette cleaning. Remove the chain if you have a quick link, soak it in degreaser, scrub the cassette and chainrings with a stiff brush, rinse everything, dry it thoroughly, and re-lube. Surface wiping during the week keeps things manageable, but it doesn’t remove the gritty paste that accumulates between cassette cogs and inside chain rollers. That grit is what accelerates wear. Inspect your brake pads carefully each month. Disc brake resin pads typically last 500 to 700 miles, while sintered or metallic pads hold up for 1,000 to 1,250 miles. The critical threshold is 1.5 millimeters of pad material remaining — below that, plan a replacement.
Below 1 millimeter, replace immediately. For rim brake users, look for the wear indicator grooves molded into the pad surface; when they’re gone, so is your braking performance. Also check shift cable tension and derailleur alignment by running through every gear on a stand or while riding slowly. If the chain hesitates, skips, or rattles in certain gears, the derailleur hanger may be slightly bent or the cable may have stretched. However, if you’re a light rider putting in under thirty miles per week in dry conditions, you can stretch some of these monthly tasks to every six or eight weeks without real consequence. The intervals assume moderate use. What you cannot skip is the bolt check — inspect stem, handlebar, seatpost, and saddle bolts for proper torque monthly. A loose stem bolt at speed is a genuine safety emergency, and bolts loosen gradually from vibration in ways you won’t feel until it’s too late. A basic torque wrench costs around twenty dollars and is one of the most important tools you can own.
When Should You Replace Your Chain, Cables, and Bearings?
Beyond weekly and monthly tasks, there’s a longer-interval tier that falls roughly every three to six months or around every 1,000 miles. Chain replacement is the headline item. A chain wear tool — sometimes called a chain checker — measures stretch. When the tool indicates 0.5 percent elongation, which is one-sixteenth of an inch over twelve inches across twenty-four rivets, it’s time for a new chain. Road bike chains typically last 2,000 to 3,000 miles; mountain bike chains wear faster due to mud, grit, and higher torque loads. Here’s the real-world math that makes chain replacement urgent: a new chain costs roughly eight to fifteen dollars. If you ride a worn chain past the replacement point, it grinds matching wear patterns into your cassette and chainrings.
A new chain on a worn cassette will skip under load, forcing you to replace the cassette too — that’s another thirty to seventy dollars. Let all three components go, and you’re looking at well over a hundred dollars in parts plus labor. A twelve-dollar chain swap every couple thousand miles is the cheapest insurance in cycling. Brake and shifter cables should be replaced every six to twelve months depending on riding volume. Fraying cables lose responsiveness gradually, making it easy to normalize degraded shifting or braking without realizing it. Headset and bottom bracket bearings should be re-greased on a similar schedule to prevent corrosion and keep steering and pedaling smooth. If you ride hydraulic disc brakes, plan on bleeding them every couple of months for heavy mountain bike use or every six months for road cycling — spongy lever feel is the telltale sign that air has entered the system.
Professional Tune-Ups vs. DIY: What’s Worth Paying For?
Professional tune-ups fall into three general tiers. A basic tune-up runs $60 to $100 and covers brake and gear adjustment, a safety check, and lubrication. A standard tune-up costs $100 to $150 and adds wheel truing, cable replacement, and a deeper cleaning. A premium overhaul runs $280 to $450 and involves a full teardown, bearing service, and all new cables and housing. The recommendation from most shops and cycling organizations is at least one professional tune-up per year, and twice per year for riders who ride regularly.
The tradeoff is straightforward. If you own a torque wrench, a chain wear tool, a set of hex keys, tire levers, a floor pump with a gauge, and a basic chain cleaning device, you can handle weekly and monthly maintenance yourself and limit shop visits to the annual or biannual professional tune-up. That annual visit catches things most home mechanics miss — headset bearing play, bottom bracket wear, wheel dish, and hub adjustment. If you don’t want to invest in tools or learn the techniques, a quarterly basic tune-up at $60 to $100 is still far cheaper than the repair bills that come from neglect. The worst financial outcome is doing nothing until something fails catastrophically — a snapped chain can damage a derailleur, a worn cassette can strip a freehub body, and a neglected headset can score your fork’s steerer tube.
Adjusting Your Schedule for Harsh Conditions and Heavy Mileage
The intervals described above assume moderate riding in mostly dry conditions. If you ride more than 100 kilometers per week — roughly 60 miles — or frequently ride in rain, mud, or dusty conditions, cut all service intervals in half. That means lubing the chain twice a week instead of once, doing a deep drivetrain clean every two weeks instead of monthly, and checking brake pad wear biweekly. This is not overcautious advice. Wet and muddy conditions force contaminated water into bearings, cable housings, and chain links at a rate that dry riding simply doesn’t.
A single muddy mountain bike ride can deposit more abrasive material on your drivetrain than a month of dry road riding. Winter road cyclists dealing with salt and slush face similar accelerated wear. The limitation here is practical — very few riders actually maintain this aggressive schedule consistently. The realistic goal is to acknowledge that conditions affect wear and to compress the schedule as much as your time allows. Even partially shortening your intervals during a wet season makes a measurable difference. Also worth noting: e-bike riders, who generate higher torque loads on drivetrains and brake systems, should budget approximately $100 to $150 per year for annual professional service that covers brake adjustments, gear tuning, and electrical system checks.
Building a Maintenance Toolkit Without Overspending
You don’t need a professional workshop to stay on top of weekly and monthly tasks. A practical starter kit includes a floor pump with a pressure gauge, a multi-tool with hex keys and a chain breaker, a chain wear checker, a basic torque wrench, tire levers, chain lube (dry for most conditions, wet if you regularly ride in rain), degreaser, a stiff-bristled brush, and clean rags.
Total cost is roughly $60 to $90 for decent quality. One example: Park Tool’s CC-2 chain checker costs about ten dollars and tells you definitively whether your chain needs replacing — it pays for itself the first time it saves you from grinding down a cassette.
Making the Schedule Stick
The biggest obstacle to bike maintenance isn’t knowledge or tools — it’s consistency. The most effective approach is to tie maintenance tasks to existing habits. Do your pre-ride check the night before a morning ride so it doesn’t eat into ride time. Pick a specific day for weekly tasks — Sunday evening works well if you ride through the week.
Set a recurring calendar reminder for monthly tasks. Riders who build these habits spend less money on repairs, experience fewer mechanical failures during rides, and frankly enjoy their bikes more because everything works the way it should. As component technology continues to evolve — longer-lasting chain coatings, self-adjusting disc brakes, electronic shifting that eliminates cable stretch — some of these tasks will eventually become less frequent. But the fundamentals of keeping a machine clean, lubricated, and properly tensioned will outlast any technology cycle.
Conclusion
Bike maintenance comes down to a manageable rhythm: check tire pressure, brakes, and wheel security before every ride; lube the chain, wipe the bike down, inspect tires, and check spokes weekly; deep clean the drivetrain, inspect brake pads, verify derailleur alignment, check bolts, and true wheels monthly. Beyond that, replace the chain every 2,000 to 3,000 miles, swap cables every six to twelve months, re-grease bearings periodically, and get at least one professional tune-up per year. The payoff is both financial and practical.
A disciplined maintenance schedule keeps repair costs low, extends component life dramatically, and — most importantly — means your bike works reliably every time you need it. Start with the weekly tasks if you’re doing nothing now. Add the monthly tasks once the weekly ones become automatic. The fifteen minutes you spend on a Sunday wiping down your drivetrain and lubing your chain will save you hours of shop time and hundreds of dollars over the course of a year.
Frequently Asked Questions
How often should I lube my bike chain?
Apply dry lube roughly every 200 miles or once per week. If you use wet lube, every 400 miles or every other week is typical. In wet or dusty conditions, increase the frequency. Always wipe off excess lube after application — a wet, over-lubed chain attracts more grit than a dry one.
How do I know when my brake pads need replacing?
For disc brakes, check pad thickness monthly. Resin pads typically last 500 to 700 miles; sintered or metallic pads last 1,000 to 1,250 miles. Plan a replacement at 1.5 millimeters of pad material remaining, and replace immediately if they’re below 1 millimeter. For rim brakes, look for the wear indicator grooves — when they’ve disappeared, the pads are done.
How much does a bike tune-up cost?
A basic tune-up covering brake and gear adjustment, safety check, and lube typically runs $60 to $100. A standard tune-up with wheel truing and cable replacement costs $100 to $150. A full premium overhaul with complete teardown and bearing service runs $280 to $450.
When should I replace my bike chain?
Check chain wear with a chain checker tool. When it reads 0.5 percent elongation — one-sixteenth of an inch of stretch over twelve inches — it’s time to replace. For road bikes, that’s typically every 2,000 to 3,000 miles. Mountain bike chains often need replacement sooner due to harsher conditions. Riding on a stretched chain accelerates wear on your cassette and chainrings, making a cheap replacement into an expensive one.
Do I need to adjust my maintenance schedule if I ride in the rain?
Yes. If you ride more than 100 kilometers per week or frequently ride in rain, mud, or dusty conditions, cut all service intervals in half. Wet riding forces contaminated water into bearings, cables, and chain links far faster than dry conditions. Even partially compressing your schedule during a wet season helps significantly.