Road bike puncture prevention stands as one of the most practical skills any cyclist can develop, yet it remains surprisingly overlooked by many riders who view flat tires as inevitable rather than largely avoidable. Every year, countless training rides, commutes, and races are derailed by the familiar hiss of escaping air””a frustration that costs cyclists not only time but also momentum, motivation, and sometimes safety when flats occur in remote locations or heavy traffic. Understanding what causes punctures and how to systematically reduce their occurrence transforms cycling from an unpredictable activity into a reliable form of transportation and exercise. The physics of road cycling create a particular vulnerability to punctures. Narrow tires inflated to high pressures concentrate rider weight onto a small contact patch, and the thin rubber casing required for low rolling resistance offers less protection than the thick, cushioned tires found on mountain bikes or commuter cycles.
Road surfaces present an ever-changing landscape of hazards: glass shards, thorns, metal debris, sharp-edged potholes, and even seemingly harmless sand can compromise tire integrity. Add in the cumulative wear that occurs over thousands of kilometers, and the conditions for punctures become almost ideal without proper prevention strategies. This comprehensive guide addresses the full spectrum of puncture prevention, from equipment choices and tire maintenance to riding techniques and roadside awareness. Readers will learn how different tire technologies protect against flats, why proper inflation matters more than most cyclists realize, and how simple changes in riding habits can dramatically reduce puncture frequency. Whether the goal is completing a century ride without stopping or simply making daily commutes more reliable, the strategies outlined here provide a framework for keeping tires intact and wheels rolling.
Table of Contents
- What Causes Road Bike Flat Tires and How Can You Prevent Them?
- Choosing Puncture-Resistant Tires for Road Cycling
- The Role of Tire Pressure in Flat Tire Prevention
- Practical Tire Maintenance Tips to Avoid Punctures
- Common Puncture Prevention Mistakes Road Cyclists Make
- Tubeless Tire Systems for Enhanced Puncture Protection
- How to Prepare
- How to Apply This
- Expert Tips
- Conclusion
- Frequently Asked Questions
What Causes Road Bike Flat Tires and How Can You Prevent Them?
Flat tires on road bikes typically fall into three categories: penetration flats, pinch flats, and slow leaks from valve or rim tape failure. Penetration flats occur when a sharp object””glass, wire, thorns, or metal debris””punctures through the tire casing and tube. These represent the most common type of road cycling puncture and are the primary focus of most prevention strategies. The object may embed in the tire and cause immediate deflation, or it may work its way through the casing over several rotations before reaching the tube. Pinch flats, sometimes called snake bites because they leave two parallel holes in the tube, happen when the tire compresses against the rim during impact with a hard edge. This typically occurs when hitting potholes, curbs, or railroad tracks with insufficient tire pressure.
The tube gets pinched between the rim and the obstacle, creating immediate air loss. While less common on road bikes than mountain bikes due to higher operating pressures, pinch flats remain a significant concern, particularly for heavier riders or those who prefer lower pressures for comfort. Prevention begins with understanding these mechanisms. Penetration flats require physical barriers between debris and the tube””whether through tire construction, sealant, or protective layers. Pinch flats demand proper inflation and riding technique. Slow leaks from compromised valves or rim tape require attention to these often-ignored components. Addressing all three categories creates a comprehensive defense system that significantly reduces overall puncture rates.
- **Penetration flats**: Caused by sharp objects piercing tire and tube; prevented through puncture-resistant tires, sealant, and debris avoidance
- **Pinch flats**: Result from impact compression between rim and obstacle; prevented through proper inflation and riding technique
- **Slow leaks**: Stem from valve failures, rim tape issues, or gradual tube degradation; prevented through component maintenance and inspection

Choosing Puncture-Resistant Tires for Road Cycling
The tire market offers a spectrum of puncture protection options, each representing a trade-off between flat resistance, weight, rolling resistance, and ride quality. At one end sit racing tires with minimal protection, prioritizing speed over durability. At the other end are commuter-focused options with thick protective belts that add weight but dramatically reduce puncture frequency. Most road cyclists benefit from tires somewhere in the middle””those offering meaningful protection without excessive performance penalties. Puncture-resistant tires employ several protective technologies. Breaker belts””layers of tightly woven synthetic material placed beneath the tread””physically block sharp objects from reaching the tube. Common materials include aramid fibers (marketed under names like Kevlar), nylon, and proprietary compounds.
Belt thickness and coverage area vary significantly between models; some protect only the center tread while others extend protection up the sidewalls. Thicker, wider belts offer more protection but increase rolling resistance and weight. Tire construction also affects puncture resistance independent of belt systems. Higher thread-per-inch (TPI) casings use finer threads woven more tightly, creating a denser barrier against penetration. However, high-TPI tires often use thinner threads overall, which can make them more vulnerable in some scenarios. Rubber compound choice matters too””harder rubber resists penetration better but offers less grip and worse ride quality. The newest generation of puncture-resistant tires use dual or triple compound designs, with harder rubber in the center for durability and softer rubber on the shoulders for cornering grip.
- **Aramid/Kevlar belts**: Provide 2-3mm of protection beneath tread; effective against glass and thorns; add 30-50 grams per tire
- **TPI considerations**: 60-120 TPI offers good balance of protection and performance; higher TPI (320+) prioritizes ride quality
- **Compound selection**: Harder compounds (70+ durometer) resist punctures but sacrifice grip; dual-compound designs offer compromise
The Role of Tire Pressure in Flat Tire Prevention
Proper inflation represents the single most effective and cost-free method of reducing puncture frequency, yet surveys consistently show that the majority of recreational cyclists ride on underinflated tires. Low pressure increases puncture risk in multiple ways: it allows debris to push deeper into the tire before being deflected, creates larger contact patches that encounter more potential hazards, and dramatically increases pinch flat susceptibility. A tire at 80 PSI when it should be at 100 PSI has lost 20% of its protective tension. Optimal pressure depends on rider weight, tire width, road conditions, and personal preference. The old advice of “inflate to maximum pressure” has been largely replaced by more nuanced understanding. Recent research shows that slightly lower pressures””still within proper range””can actually reduce some puncture types while improving comfort and grip.
The key is finding the minimum pressure that prevents pinch flats and excessive tire deformation while maintaining reasonable rolling resistance. For most road cyclists on 25mm tires, this falls between 80-100 PSI for the rear tire and 5-10 PSI lower for the front. Pressure maintenance matters as much as initial inflation. Butyl tubes lose approximately 1-2 PSI per day through normal permeation; latex tubes lose considerably more. A tire inflated perfectly on Monday may be dangerously soft by Friday. Weekly pressure checks should be considered minimum maintenance, with inflation before every ride as the ideal standard. Digital pressure gauges accurate to 1-2 PSI cost under $30 and provide far more reliable readings than built-in pump gauges or the squeeze test.
- **Minimum safe pressure**: Approximately 15% of rider system weight divided by tire width provides starting point; adjust based on conditions
- **Pressure loss rates**: Butyl tubes lose 1-2 PSI daily; latex tubes lose 5-10 PSI daily; temperature changes affect pressure significantly
- **Checking frequency**: Minimum weekly; ideally before every ride; required after temperature swings exceeding 20°F
Practical Tire Maintenance Tips to Avoid Punctures
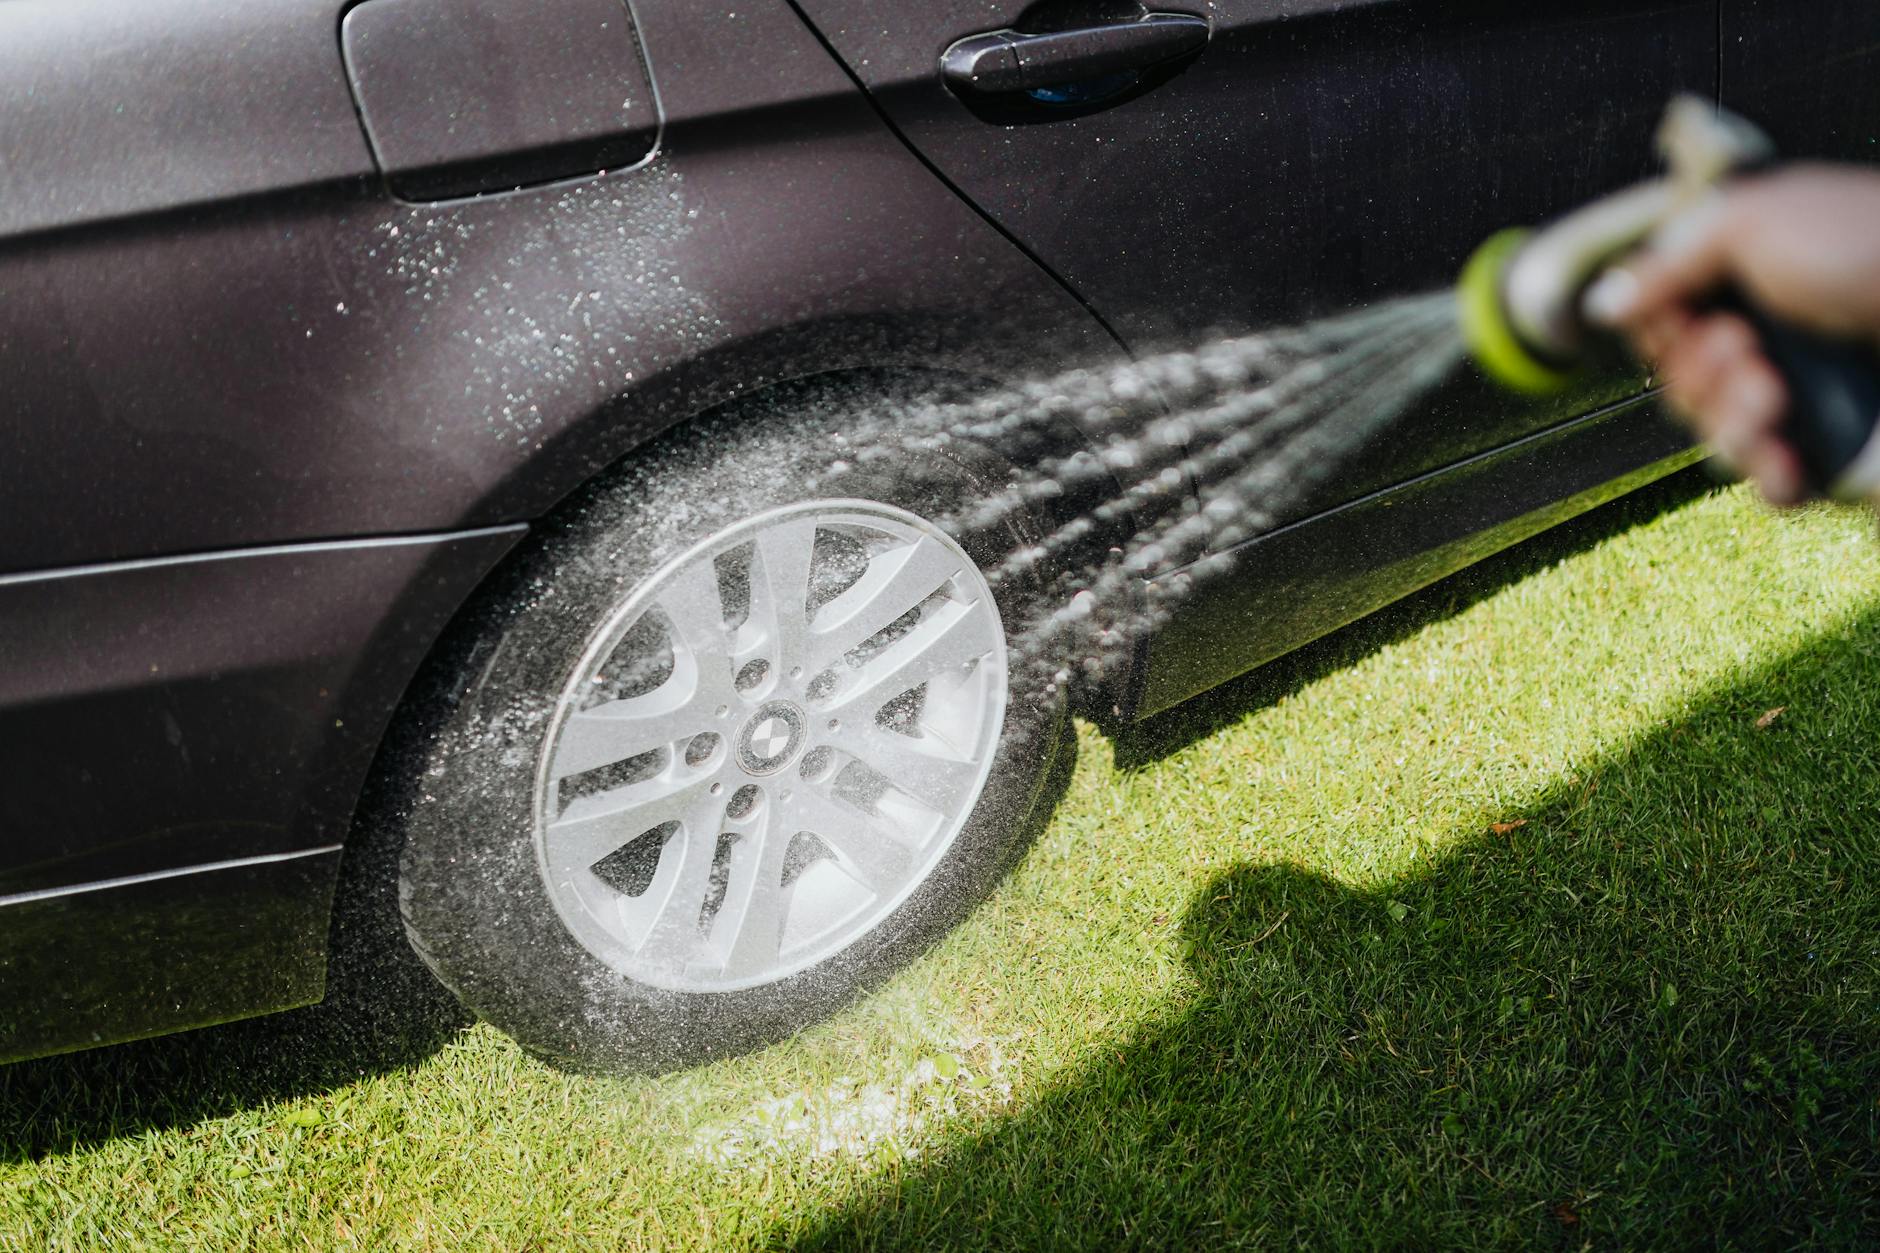
Regular tire inspection catches developing problems before they strand riders roadside. After each ride, a quick visual scan of both tires takes under thirty seconds and can reveal embedded debris that hasn’t yet penetrated to the tube. Glass shards, staples, and thorns often lodge in the tread without causing immediate deflation, working deeper with each subsequent ride until breakthrough occurs. Removing these intruders promptly prevents the delayed punctures that seem to strike without warning. Deeper inspection should occur weekly or every few hundred kilometers. Remove wheels and spin them slowly while examining the entire tread surface and sidewalls. Look for cuts, bulges, worn areas, and embedded objects.
Run fingers along the tread to detect debris too small to see easily. Check for sidewall cracking or dry rot, particularly on older tires or those stored in sunlight. A tire that appears fine during casual observation may reveal significant damage under close examination. Tire rotation extends usable life and can prevent failures. Rear tires wear faster than fronts due to weight distribution and driving forces, typically lasting 60-70% as long. When rear tires reach approximately half their tread life, swap positions with the front. This practice helps avoid the complete wear-through that can cause catastrophic failure. Track tire mileage using a cycling computer or log; most quality road tires last 2,000-4,000 kilometers before the rear needs replacement, with fronts lasting 3,000-5,000 kilometers.
- **Post-ride checks**: Visual scan for embedded debris; remove immediately with needle-nose pliers or similar tool
- **Weekly inspection**: Thorough examination of tread and sidewalls; check for cuts, bulges, and wear indicators
- **Rotation schedule**: Swap front and rear at approximately 1,500-2,000 km rear tire mileage; track odometer readings
Common Puncture Prevention Mistakes Road Cyclists Make
The most prevalent error involves tire age rather than tire wear. Rubber compounds degrade over time regardless of use, losing flexibility and developing micro-cracks that compromise integrity. Tires more than four to five years old””even those with plenty of tread remaining””should be considered for replacement. Manufacturing date codes stamped on sidewalls show week and year of production. A tire showing no visible wear but manufactured in 2019 is now well past its optimal lifespan. Another common mistake involves sealant mismanagement. Tubeless setups and tube sealants work only when liquid sealant remains present and fluid. Most sealants begin drying within two to four months, leaving riders with a false sense of security long after protection has evaporated.
Regular sealant checks and top-offs are essential; some tubeless riders mark calendar reminders for monthly inspections. For tubes with sealant, shaking the wheel should produce audible liquid movement. Silence indicates dried sealant requiring replacement. Improper tube installation creates vulnerabilities that prevention products cannot address. Tubes pinched beneath tire beads during installation often develop slow leaks or sudden failures unrelated to road debris. Insufficient tire seating leaves gaps where debris can enter more easily. Rushed roadside repairs frequently create these issues, which then manifest as repeated flats in the same location. Taking extra time during installation””fully inflating and deflating to seat tubes properly””prevents many mysterious recurring punctures.
- **Tire age neglect**: Rubber degrades regardless of use; check date codes; replace tires older than 4-5 years
- **Sealant maintenance failures**: Check and replenish sealant every 2-4 months; dried sealant provides zero protection
- **Installation errors**: Pinched tubes and poorly seated beads cause preventable failures; take time during installation

Tubeless Tire Systems for Enhanced Puncture Protection
Tubeless technology, long standard in mountain biking, has matured significantly for road applications and offers compelling puncture prevention benefits. By eliminating the tube, tubeless systems remove pinch flats from the equation entirely””there’s simply nothing to pinch between rim and tire. More importantly, the liquid sealant circulating inside tubeless setups automatically plugs small punctures as they occur, often without the rider noticing. A thorn that would flat a tubed tire simply gets sealed and continues rolling. The trade-offs deserve honest assessment. Tubeless road setups require compatible wheels and tires, which may necessitate upgrades.
Initial installation can challenge even experienced mechanics, with tire seating sometimes requiring compressor-level air pressure. Sealant adds weight, mess, and ongoing maintenance requirements. Catastrophic failures””large cuts that overwhelm sealant capacity””can be more difficult to address roadside than traditional tube failures. For riders covering remote routes far from assistance, carrying a backup tube for tubeless tires provides essential insurance. When tubeless systems work well, puncture rates drop dramatically””many long-term users report 80-90% fewer flats requiring attention. The combination of eliminated pinch flats and self-sealing small punctures means many riders complete entire seasons without a single roadside repair. For high-mileage cyclists, commuters, or those riding in debris-prone areas, the initial investment and learning curve often prove worthwhile.
- **Key benefits**: No pinch flats; self-sealing punctures; potentially lower rolling resistance at equivalent pressures
- **Challenges**: Higher initial cost; installation difficulty; ongoing sealant maintenance; complex roadside repair
- **Best candidates**: High-mileage riders; urban commuters; those willing to invest in compatible wheelsets
How to Prepare
- **Assess current equipment vulnerabilities**: Examine existing tires for age, wear, and protection level. Check manufacturing date codes””four-digit numbers indicating week and year. Note any cuts, embedded debris, or sidewall damage. Evaluate whether current tires offer appropriate puncture resistance for typical riding conditions and routes.
- **Establish proper baseline inflation**: Determine optimal pressure based on rider weight, tire width, and conditions. Use a quality floor pump with accurate gauge for initial inflation. Record target pressures for both tires””front typically runs 5-10 PSI lower than rear. Mark these numbers on the pump or in a visible location for consistent inflation.
- **Implement pre-ride inspection routine**: Develop a 60-second check performed before every ride. Verify pressure with gauge or practiced thumb test. Spin each wheel while watching for embedded debris, cuts, or bulges. Check that tires remain properly seated on rims with no exposed tube visible. Confirm quick releases or thru-axles are properly secured.
- **Create maintenance schedule**: Set calendar reminders for weekly detailed tire inspections, monthly sealant checks (if applicable), and quarterly assessments of tire wear and age. Track tire mileage using cycling computer data or manual logging. Plan replacement timing before tires reach failure-prone wear levels.
- **Assemble appropriate repair kit**: Carry spare tube(s) compatible with current tire setup, portable pump or CO2 inflator, tire levers, and patch kit for backup. For tubeless systems, include emergency tube, valve core removal tool, and tire plugs. Verify that all components work correctly before needing them roadside.
How to Apply This
- **Maintain weekly inflation discipline**: Check and adjust tire pressure at minimum every seven days, ideally before each ride. Account for temperature changes””pressure drops approximately 2% for every 10°F decrease in ambient temperature. Winter riders may need significantly higher starting pressures to maintain safe minimums.
- **Practice active debris avoidance**: Scan road surface continuously while riding, looking 10-20 feet ahead for hazards. Position within lane to avoid gutter lines where debris accumulates. After vehicles pass on wet roads, wait 2-3 seconds before riding through their path””tires throw debris to the side. Learn to recognize high-risk zones: construction areas, post-storm roads, parking lot exits.
- **Execute post-ride tire clearing**: After every ride, particularly those through debris-prone areas, visually inspect both tires. Run gloved hand across tread surface to detect embedded objects. Remove any foreign material immediately using needle-nose pliers, tweezers, or similar tool. Address any cuts or damage discovered during inspection.
- **Respond appropriately to embedded debris while riding**: If hearing or feeling debris contact during a ride, stop promptly and inspect. Objects encountered at speed may lodge in tread without immediate consequence. Early removal prevents penetration that occurs over subsequent rotations. Carrying small pliers enables roadside debris extraction.
Expert Tips
- **Monitor tread wear indicators**: Many quality road tires include wear indicator holes or grooves in the tread center. When these disappear or become shallow, puncture resistance has degraded significantly even if visible rubber remains. Replace tires when indicators suggest””don’t wait for wear-through.
- **Consider front and rear tire strategy**: Some cyclists run maximum puncture protection on the rear tire, where most flats occur due to weight distribution, while using lighter, faster-rolling tires up front. This approach saves weight and rolling resistance where it matters most while protecting the higher-risk wheel.
- **Match prevention to riding context**: Training rides through urban areas with glass and debris warrant different equipment choices than fast group rides on clean rural roads. Owning multiple wheelsets or having several tire options allows matching protection level to specific ride demands.
- **Learn to read road surfaces**: Different pavement textures present varying puncture risks. Fresh asphalt typically contains fewer embedded hazards than aged, cracked surfaces. White road paint often sits proud of surrounding pavement and can hide debris in gaps. Railroad crossings and metal grates deserve careful approach angles and reduced speed.
- **Address repeated flats systematically**: Multiple punctures in short succession usually indicate either embedded debris in the tire that wasn’t removed, rim tape failure exposing spoke holes, a damaged tube being repatched rather than replaced, or riding conditions requiring upgraded equipment. Investigate and address root causes rather than simply patching repeatedly.
Conclusion
Effective road bike puncture prevention combines appropriate equipment selection, diligent maintenance practices, and aware riding habits into a system that dramatically reduces flat tire frequency. While no approach eliminates punctures entirely””road cycling will always involve some exposure to hazards””the difference between riding with thoughtful prevention strategies and riding without them typically means the difference between occasional annoyances and frequent disruptions. Cyclists who implement the practices outlined here commonly report 70-80% reductions in annual flat counts. The investment in puncture prevention pays dividends beyond simple convenience.
Reliable tires build confidence for longer rides into unfamiliar territory, enable bike commuting as practical transportation, and remove a significant source of cycling frustration. Time not spent changing tubes translates to more miles ridden and more enjoyment derived from those miles. Begin by addressing the fundamentals””proper inflation and regular inspection””then gradually add equipment upgrades and technique refinements as budget and experience allow. The path to puncture-free riding is progressive rather than immediate, but each improvement contributes to an increasingly reliable cycling experience.
Frequently Asked Questions
How long does it typically take to see results?
Results vary depending on individual circumstances, but most people begin to see meaningful progress within 4-8 weeks of consistent effort. Patience and persistence are key factors in achieving lasting outcomes.
Is this approach suitable for beginners?
Yes, this approach works well for beginners when implemented gradually. Starting with the fundamentals and building up over time leads to better long-term results than trying to do everything at once.
What are the most common mistakes to avoid?
The most common mistakes include rushing the process, skipping foundational steps, and failing to track progress. Taking a methodical approach and learning from both successes and setbacks leads to better outcomes.
How can I measure my progress effectively?
Set specific, measurable goals at the outset and track relevant metrics regularly. Keep a journal or log to document your journey, and periodically review your progress against your initial objectives.
When should I seek professional help?
Consider consulting a professional if you encounter persistent challenges, need specialized expertise, or want to accelerate your progress. Professional guidance can provide valuable insights and help you avoid costly mistakes.
What resources do you recommend for further learning?
Look for reputable sources in the field, including industry publications, expert blogs, and educational courses. Joining communities of practitioners can also provide valuable peer support and knowledge sharing.


