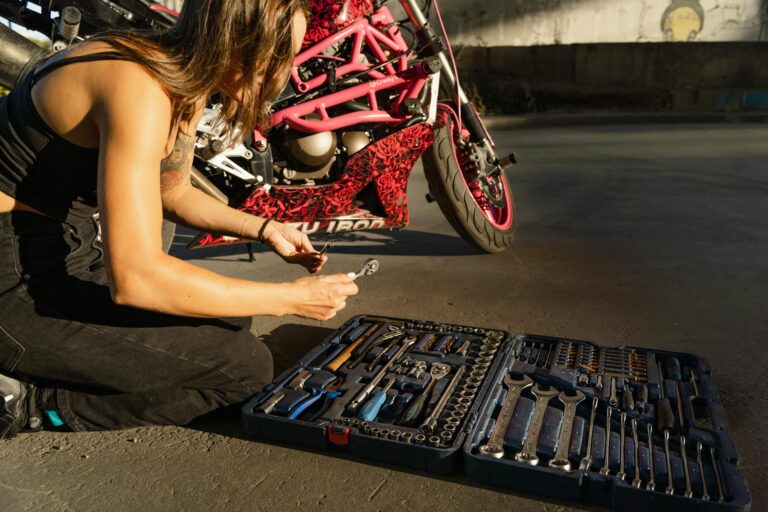
Learning how to replace a bicycle tire is one of the most fundamental skills every cyclist should master, regardless of whether you ride casually around the neighborhood or tackle challenging mountain trails. A flat tire can happen anywhere—on a quiet suburban street, miles into a rural route, or during your daily commute—and the ability to handle this common mechanical issue transforms a potentially stranded situation into a minor inconvenience lasting just a few minutes. Understanding the tire replacement process also saves money over time, as frequent visits to a bike shop for basic repairs add up quickly. Flat tires occur for numerous reasons: punctures from glass, thorns, or sharp debris; pinch flats caused by hitting potholes or curbs; slow leaks from aging valve stems; or simply worn tire treads that have become thin and vulnerable.
Many new cyclists feel intimidated by the prospect of removing a wheel, working with tire levers, and handling inner tubes, but the process is far more straightforward than it appears. The tools required are minimal, the techniques are learnable in a single afternoon, and the confidence gained from completing your first successful tire change is genuinely empowering. By the end of this guide, you will understand the complete process of replacing a bicycle tire from start to finish. This includes identifying when replacement is necessary versus when a simple patch will suffice, gathering the correct tools and replacement parts, safely removing your wheel, extracting the damaged tube or tire, installing new components, and properly inflating everything back to riding condition. Whether you ride a road bike, mountain bike, hybrid, or cruiser, these foundational skills apply across virtually all bicycle types with only minor variations.
Table of Contents
- When Should a Beginner Replace a Bicycle Tire Instead of Patching It?
- Essential Tools and Supplies for Bicycle Tire Replacement
- Understanding Bicycle Tire and Wheel Components
- Step-by-Step Guide to Removing Your Bicycle Wheel
- Common Beginner Mistakes When Replacing Bicycle Tires
- Tire Selection Considerations for Different Cycling Disciplines
- How to Prepare
- How to Apply This
- Expert Tips
- Conclusion
- Frequently Asked Questions
When Should a Beginner Replace a Bicycle Tire Instead of Patching It?
understanding when to replace a bicycle tire versus simply patching an inner tube saves both time and money while keeping you safe on the road. Inner tube punctures from small debris like thorns, glass shards, or staples can typically be repaired with a patch kit, which costs only a few dollars and takes about ten minutes to apply correctly. However, certain types of damage require complete tube or tire replacement, and recognizing these situations prevents repeated flats and potential accidents. The inner tube—the inflatable rubber component inside your tire that actually holds the air—should be replaced rather than patched when it has multiple punctures in different areas, when the puncture is located at or near the valve stem, when the rubber has become brittle with age and shows cracking, or when a previous patch has failed. Tubes are inexpensive, typically ranging from five to fifteen dollars, making replacement often more practical than attempting to salvage a heavily damaged tube.
Pinch flats, which create characteristic parallel cuts known as “snake bites,” can sometimes be patched if the cuts are small, but larger pinch damage often warrants replacement. The outer tire itself—the rubber casing with tread that contacts the ground—requires replacement under different circumstances. Visible threads showing through worn tread, sidewall cuts or bulges, cracking from UV damage or age, and persistent flats despite new tubes all indicate tire replacement is necessary. A tire with compromised structural integrity cannot be safely repaired and poses genuine risk of sudden failure while riding. Most bicycle tires last between 2,000 and 5,000 miles depending on riding conditions, tire quality, and proper inflation maintenance.
Essential Tools and Supplies for Bicycle Tire Replacement
Before beginning any tire replacement, gathering the correct tools ensures the process goes smoothly without frustrating interruptions to search for missing equipment. The essential toolkit for bicycle tire replacement is refreshingly simple and affordable, making it accessible for beginners to assemble a complete kit for under thirty dollars that will handle virtually any tire-related situation. Tire levers are the most critical specialized tool, designed specifically to pry the tire bead away from the rim without damaging either component. These small plastic or metal implements typically come in sets of two or three and feature a curved end for hooking under the tire bead and a notched end for clipping onto spokes to hold the lever in place while you work. While some experienced mechanics can remove tires using only their hands, beginners should absolutely use tire levers to prevent frustration and avoid pinching the inner tube during removal or installation.
Quality plastic tire levers cost around five dollars for a set and last for years. A floor pump with a pressure gauge ranks as the second most important tool, as proper inflation is essential both during and after tire replacement. While portable mini-pumps work adequately for emergency roadside repairs, a floor pump makes home repairs significantly easier and faster. Pumps should match your valve type—Presta valves are narrow and have a locking nut, while Schrader valves are wider and identical to car tire valves. Many modern pumps accommodate both types. Beyond these core tools, keeping spare inner tubes sized to your wheel diameter and width, a patch kit for emergencies, and possibly a set of metric Allen wrenches for wheels with bolt-on axles completes a functional tire repair kit.
Understanding Bicycle Tire and Wheel Components
Successful tire replacement requires familiarity with the components you will be handling, as this knowledge helps prevent common mistakes and damage during the process. A bicycle wheel assembly consists of several distinct parts working together, each with specific characteristics that affect how you approach removal and installation. The wheel itself comprises the hub at the center, which contains the axle and bearings; the spokes radiating outward that provide structural support; and the rim forming the outer circle where the tire mounts. Rims feature a specific profile with raised edges called the “bead seat” where the tire locks into place. Most modern bicycle rims are made from aluminum alloy, though carbon fiber appears on high-end wheels. The rim also includes a strip of protective tape covering the spoke holes to prevent the inner tube from being punctured by spoke ends or the holes themselves—this rim tape should be inspected during any tire change and replaced if damaged or misaligned.
The tire consists of multiple components despite appearing as a single piece. The outer tread provides grip and wear resistance, while the casing beneath contains layers of fabric (typically nylon or cotton) that give the tire its shape and strength. The bead runs along both edges of the tire—this is the reinforced section, often containing a steel or Kevlar wire, that locks into the rim’s bead seat when inflated. Inside the tire sits the inner tube, a donut-shaped rubber bladder that holds air and provides cushioning. The tube connects to the outside world through its valve, which protrudes through a hole in the rim. Understanding how these components interact—particularly how the bead seats against the rim and how the tube sits within the tire casing—makes installation much more intuitive.
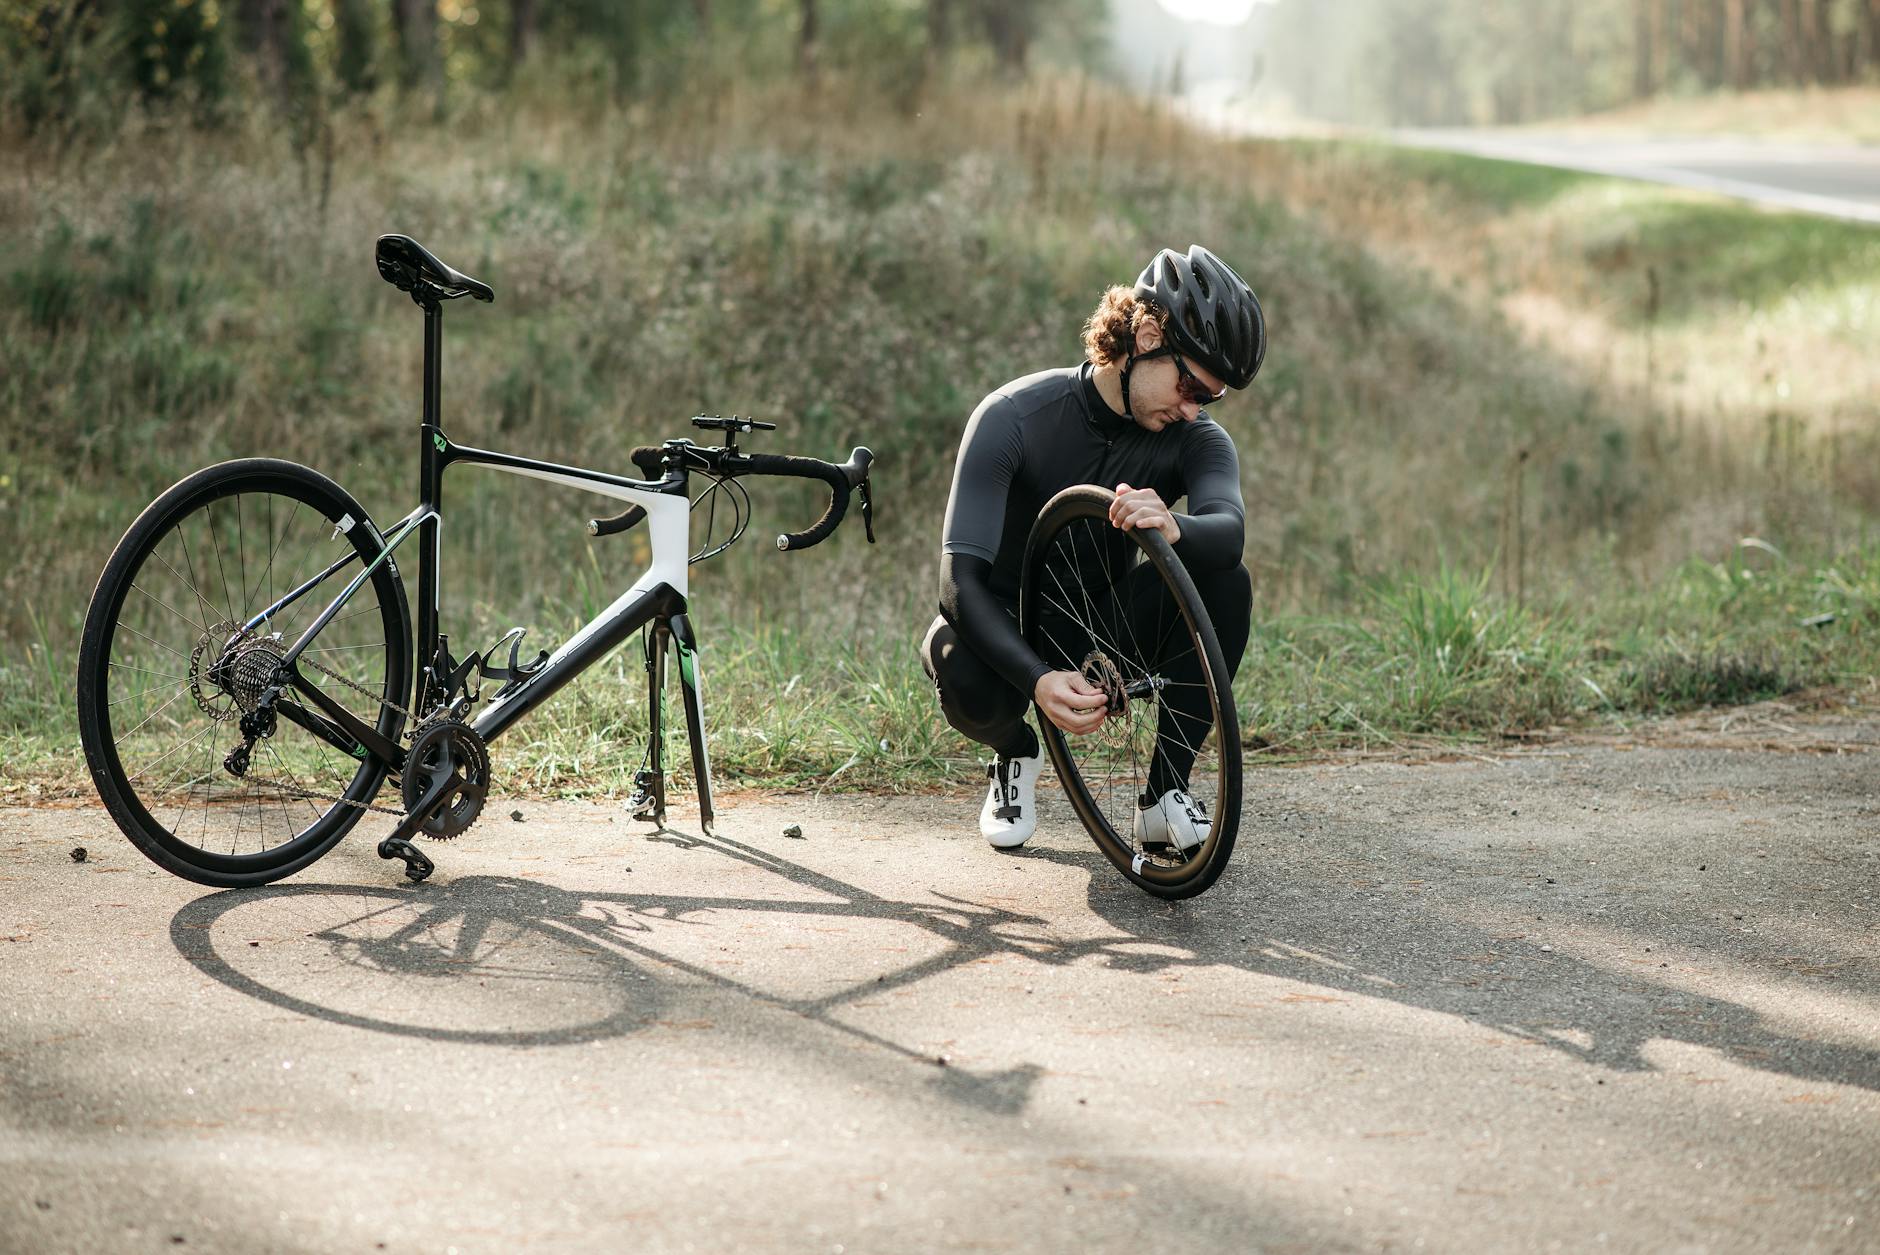
Step-by-Step Guide to Removing Your Bicycle Wheel
Removing the wheel is the necessary first step in any tire replacement, and the process differs slightly depending on whether you are working with the front or rear wheel and what type of axle retention system your bicycle uses. Modern bicycles typically use one of three systems: quick-release skewers, thru-axles, or traditional bolt-on axles, each requiring a slightly different approach. Quick-release wheels are the most common on road and hybrid bicycles manufactured in recent decades. The quick-release lever sits on one side of the axle and, when opened by pulling it outward and rotating it 180 degrees, loosens a cam mechanism that allows the wheel to drop free from the frame’s dropouts. For front wheels, you may also need to release a secondary safety tab on some fork designs. Rear wheels require shifting the chain to the smallest cog before removal, which positions the chain for easiest wheel extraction.
Once the quick-release is open, hold the bicycle upright, and the wheel should drop downward with gentle encouragement. Thru-axles, increasingly common on modern disc brake bicycles and mountain bikes, work differently. These axles pass completely through the hub and thread into the opposite side of the fork or frame. Removal involves unthreading the axle by turning it counterclockwise—some have lever handles while others require an Allen wrench—and then pulling the axle completely out before the wheel can be removed. Bolt-on axles found on many entry-level bicycles require a 15mm wrench to loosen the nuts on each side of the hub before the wheel can be extracted. Regardless of axle type, when working with rear wheels, note the chain position and derailleur alignment to make reinstallation straightforward.
Common Beginner Mistakes When Replacing Bicycle Tires
Even with careful attention, several common mistakes can frustrate beginners or lead to immediate repeat flats, making awareness of these pitfalls valuable before you begin your first tire replacement. Most of these errors are easily avoided once you know what to watch for, transforming potential problems into non-issues. The single most common cause of repeat flats during tire installation is pinching the inner tube between the tire bead and the rim. This occurs when the tube gets caught as you lever the tire back onto the rim, creating a small cut that may not be immediately apparent but causes air loss within minutes or hours of inflation. Preventing pinch flats requires patience: after seating one bead completely, partially inflate the new tube so it holds its shape, insert it into the tire, and before seating the second bead, methodically push the tube up into the tire cavity along the entire circumference.
Many mechanics run their fingers along both sides of the rim after installation specifically to verify no tube is caught under the bead. Installing tires in the wrong direction is another frequent beginner error, though its consequences are less severe. Many tires feature directional tread patterns designed to channel water or grip optimally in a specific rotation direction. An arrow or rotation indicator on the tire sidewall shows the correct orientation—match this to your wheel’s forward direction. Inadequate inflation after installation also causes problems, as underinflated tires are highly susceptible to pinch flats from impacts and suffer from poor handling characteristics. Always inflate to the pressure range printed on the tire sidewall, typically 80-130 PSI for road tires and 30-50 PSI for mountain bike tires.

Tire Selection Considerations for Different Cycling Disciplines
Choosing the correct replacement tire involves more than simply matching the size printed on your current tire, as different riding styles benefit from specific tire characteristics that affect grip, rolling resistance, durability, and puncture protection. Understanding these factors helps you select a tire optimized for your particular cycling needs. Road cyclists typically prioritize low rolling resistance and light weight, with tire widths ranging from 23mm to 32mm becoming increasingly popular even among performance-oriented riders as research has shown wider tires can be equally fast while offering improved comfort.
Mountain bikers select tires based on terrain, with aggressive knobby treads for loose or muddy conditions and smoother, faster-rolling treads for hardpack trails. Commuters and urban cyclists often benefit from tires featuring built-in puncture protection layers—brands like Schwalbe Marathon and Continental Gatorskin include Kevlar or similar materials that dramatically reduce flat occurrence in debris-heavy city environments. Tire compound also matters: softer rubber provides better grip but wears faster, while harder compounds last longer but sacrifice some traction, particularly in wet conditions.
How to Prepare
- **Identify your tire size and valve type** by reading the numbers on your current tire sidewall. Common sizes include 700x25c for road bikes and 26×2.0 or 29×2.25 for mountain bikes. The first number indicates wheel diameter, the second indicates width. Note whether your valves are Presta (narrow with a locking nut) or Schrader (wider, car-tire style) to ensure replacement tubes are compatible.
- **Gather all necessary tools** including tire levers, a floor pump or frame pump with pressure gauge, replacement inner tube, and optional patch kit for emergencies. If your wheel uses bolt-on axles, locate the appropriate 15mm wrench. Having everything within arm’s reach prevents interruptions once you begin.
- **Create a clean workspace** with adequate lighting where you can lay the bicycle on its side or mount it in a repair stand. A clean surface prevents debris from contaminating the rim or new tube. Keep a rag handy for wiping components and your hands.
- **Shift to the smallest rear cog** if replacing a rear tire, which positions the chain and derailleur for easiest wheel removal and reinstallation. For front wheels, no drivetrain adjustment is necessary.
- **Release brake tension if necessary** on bicycles with rim brakes by opening the brake quick-release or unhooking the cable noodle on linear-pull brakes. Disc brake bicycles typically require no brake adjustment for wheel removal. Verify you can easily remove the wheel before deflating the tire.
How to Apply This
- **Remove the wheel** by opening the quick-release lever, unscrewing the thru-axle, or loosening the axle nuts as appropriate to your bicycle. Lift the frame while guiding the wheel downward, managing the chain if working on the rear wheel.
- **Deflate the tube completely and unseat the tire** by pressing the valve core to release remaining air, then insert a tire lever under the bead approximately two inches from the valve. Pry downward to lift the bead over the rim edge, hook the lever to a spoke, insert a second lever a few inches away, and slide it around the rim to unseat one side of the tire completely.
- **Remove the tube and inspect the tire interior** by pulling the tube out through the unseated bead, starting opposite the valve. Run your fingers carefully around the inside of the tire to feel for embedded debris, thorns, or glass that could puncture the new tube. Remove any foreign objects found.
- **Install the new tube and reseat the tire** by slightly inflating the new tube so it holds its shape, inserting the valve through the rim hole, and tucking the tube into the tire cavity around the entire circumference. Beginning opposite the valve, work the tire bead back over the rim edge using your hands, finishing at the valve. Avoid using tire levers for the final section if possible to prevent pinching.
Expert Tips
- **Check your rim tape condition** whenever you have a tire off, ensuring it covers all spoke holes without gaps, tears, or misalignment. Damaged rim tape is a hidden cause of recurring flats that many cyclists overlook.
- **Apply a light dusting of talcum powder** inside the tire before installing a new tube. This reduces friction between the tube and tire casing, allowing the tube to shift and settle properly during inflation rather than bunching or folding.
- **Inflate in stages rather than all at once**, stopping at about half pressure to visually verify the tube is not pinched anywhere and the tire bead is seating evenly around both sides of the rim. Complete inflation only after confirming proper seating.
- **Keep at least one spare tube sized for your bike** in your repair kit at all times, as patches can fail in the field and some punctures are simply too large to repair effectively. A spare tube transforms a potential ride-ending situation into a fifteen-minute delay.
- **Practice tire changes at home before you need to perform one roadside**, where stress, time pressure, and unfavorable conditions make everything more difficult. Familiarity with your specific bicycle’s wheel removal and tire installation characteristics builds confidence and speed.
Conclusion
Mastering bicycle tire replacement opens a door to greater cycling independence and confidence. What initially seems like a complex mechanical task becomes routine after just a few practice sessions, and the ability to handle this common roadside issue means you can venture further from home without anxiety about being stranded by a simple flat. The tools required are inexpensive, the techniques are accessible to anyone willing to learn, and the satisfaction of completing your first successful tire change is a genuine milestone in any cyclist’s journey.
Beyond the practical benefits, understanding how your bicycle’s tires and wheels function creates a foundation for broader mechanical literacy. Cyclists who can change a tire often progress naturally to other maintenance tasks—adjusting brakes, tuning derailleurs, or replacing worn components—that further reduce dependence on bike shops for routine care. This progression saves money, reduces downtime when issues arise, and deepens the connection between rider and machine that makes cycling such a rewarding pursuit.
Frequently Asked Questions
How long does it typically take to see results?
Results vary depending on individual circumstances, but most people begin to see meaningful progress within 4-8 weeks of consistent effort. Patience and persistence are key factors in achieving lasting outcomes.
Is this approach suitable for beginners?
Yes, this approach works well for beginners when implemented gradually. Starting with the fundamentals and building up over time leads to better long-term results than trying to do everything at once.
What are the most common mistakes to avoid?
The most common mistakes include rushing the process, skipping foundational steps, and failing to track progress. Taking a methodical approach and learning from both successes and setbacks leads to better outcomes.
How can I measure my progress effectively?
Set specific, measurable goals at the outset and track relevant metrics regularly. Keep a journal or log to document your journey, and periodically review your progress against your initial objectives.
When should I seek professional help?
Consider consulting a professional if you encounter persistent challenges, need specialized expertise, or want to accelerate your progress. Professional guidance can provide valuable insights and help you avoid costly mistakes.
What resources do you recommend for further learning?
Look for reputable sources in the field, including industry publications, expert blogs, and educational courses. Joining communities of practitioners can also provide valuable peer support and knowledge sharing.